Posts

Showing posts from November, 2020

A Cricut Challenge

Image
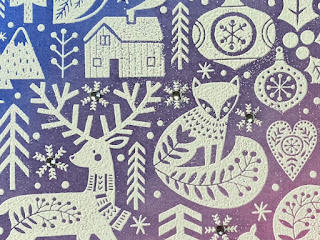
I bought this Nordic ornament stamp last week and I’ve been trying to think of the best way to present it.  It’s about 5¼” across and I don’t have any dies that big.  Also, I wanted it to have the hanger part on the top too so a straight circle die wouldn’t work.  This seemed like a perfect job for the Cricut. To begin, I stamped the hanger and bow and scanned it in to my computer.  I imported it into Inkscape using a great tutorial from TroyTube on YouTube and then added an offset (the red part) to give me my basic cut-out shape.  I played around with the shape a bit to remove the holes to make the cut-out section sturdier. Next, I uploaded the finished shape into Cricut Design Space and scaled it to fit the stamped image.  I made the basic card shape by making a circle 5½” diameter and welding the ornament hanger onto the top.  I also sliced a smidge off the bottom so that the card would stand up.  The shape was duplicated and flipped horizontally so that it would be a mi

Christmas Watercolour

Image
This week, I’ve been slightly obsessed with watching beginner watercolour videos on YouTube.  I’ve watched loads of videos - they’ve kept me entertained (distracted?) whilst I’ve been on the treadmill!  The artists all make watercolour painting look so easy.  I’ve never painted but have fancied trying out watercolour for a while, so thought following some guidance would be a good place to start. First was a scene with a colour washed background with fir trees in the foreground from Maremi SmallArt. I colour washed and dried the background before painting in the trees in varying shades of grey/black.  This gives depth to the scene by making it look like the lighter trees are further away and darker ones in the foreground.  Once the pictures were dry, I splattered on some white acrylic paint for snow.  I was very happy with how these turned out. After completing these two, I went downstairs to show Mr L and found that he had been busy creating himself.  He’d fashione

Christmas Tree Skirt

Image
  Whilst your decorated artificial Christmas tree may look stunning, the stand usually doesn’t, by virtue of it having to be practical rather than aesthetic.  I used to just lay sheets of cotton wool ‘snow’ around mine but then heard of a tree skirt and set about making my own.  We have two trees so I made one with Christmas trees on and one with snowman.  Here’s the snowman skirt.   A friend was admiring the skirts and asked where I’d bought them and subsequently commissioned me to make one for his tree.  His daughter then admired that one and requested one of her own so I thought it’d make the perfect Christmas project for the blog.  So, if you fancy having a go at making your own, here’s how I did mine.    First, draw a circle that will cover the legs of your stand plus an extra inch or two for the seams.  Cut out a section so that the skirt will form a cone shape and then cut this out from your main fabric and backing fabric.  I divided my paper template into 3 pieces

Snowflake Spinner Card

Image
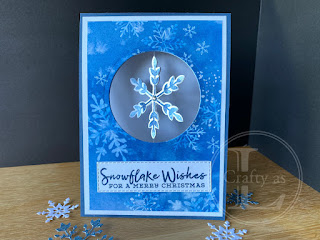
This week’s project is a fun card, giving a little surprise to the recipient.  When the card is opened, the snowflake spins around. Of course, it doesn’t have to be a spinning snowflake, you can use any shape.  I include a star shaped card at the end which looks really cool! To begin, I cut the aperture from the card base and layers.  To get them to line up perfectly, I layered the pieces without gluing, placed my circle die and held them all in place with a post-it note for running through the Big Shot. The card base didn’t cut through as there were too many layers but it did leave an impression so I knew where to put the die the second time around. Next, I stamped my snowflake images and cut them out.  They seemed a little flimsy for my purpose so I cut another 2 snowflakes from thick Whisper White card and stuck one to the back of each stamped image.  I sandwiched a length of beading elastic down the centre of the two snowflakes to make the spinning element.  I have also seen peo

A Fist Full of Kitties

Image
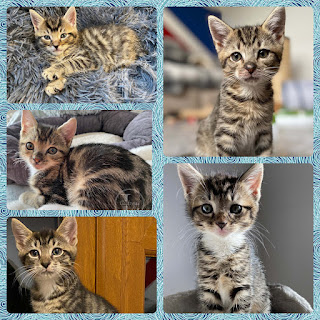
  A couple of months ago, Mr. L and I volunteered to foster some kittens for a local charity,  The Cat Welfare Group .  The charity was inundated after collecting 28 kittens from one location and were asking for fosterers, so we decided to give it a try.  Six weeks ago, these we picked up these little bundles, who were about 5 weeks old.  The little fluff balls are Scooby, Scrappy, Fred, Daphne and Dill.  Dill’s an interloper.  He was the only survivor from his litter so he was put in with the Scooby Gang for company. Kittens are major time wasters!  Aside from feeding them 3 times a day, we played with them loads, cuddled them when they were tired and also became a cat bed when required! It’s been a great privilege watching them grow up, learning new skills and seeing their personalities develop.  I’d made them each a blanket to take with them so that they had something with a familiar scent to help them transition into their new homes.  I’d wanted to have a go at