Posts

Showing posts with the label valentine

Love You

Image
Our Design Team theme this week is ‘Valentine’ and my brief is a non-card make so I’m making a tag that could be used on a gift or a bottle of fizz.   I had to think outside the box a bit as I don’t have any romantic stamps but that’s where Visible Image stamps are so versatile.   For my tag base, I used an inky panel that I’d sprayed with Picked Raspberry and Lumberjack Plaid Distress Stains and Barn Door and Picked Raspberry Distress Spritz for a little shimmer.   I then used the typewriter from  One Kind Word which I stamped and clear heat-embossed.   I repeated the stamping and heat-embossing on a sheet of white card, adding a sentiment, and fussy cut the paper.   This was adhered to the tag. Using the two hearts in the set, I repeat stamped these all over the tag to add more interest to the background. Finally, I wanted “love you” at the bottom but there isn’t that in the set.   There is, however, “you are loved” so I did some partial...
Somebunny Loves You!

Image
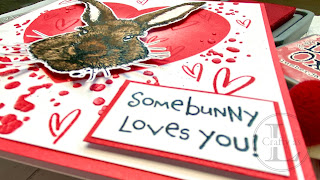
Welcome to my Visible Image DT post and, as Valentine’s Day approaches, I’ve gone all romantic!   You could easily make this a non-Valentine’s card though by switching up the colour scheme. To begin, I blended Lumberjack Plaid Distress Oxide ink through the Heart Ink stencil, with heavy coverage on the edge but blending out to leave the centre white.   Next, I placed the heart stencil into the aperture and applied Nuvo Crackle Mousse Rose Hip through the holes.   The panel was set aside to dry fully and develop the crackle. The main focal element was to be the large bunny from the Happy Bunny stamp set.   I stamped the bunny with black Versafine, added clear embossing powder and heat set.   He was then water-coloured and fussy-cut once dry. The sentiment was stamped and clear heat-embossed then trimmed.   I cut another panel slightly larger than the sentiment to back it.   Lumberjack Plaid was blended around the edge then the sentiment adhere...

Moonlit Anniversary

Image
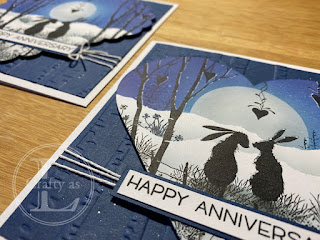
I have quite a few anniversary cards to make during the first 3 months of the year.  These 2 were made for my parents and some close friends – neither of which know each other so it didn’t matter that they were similar.  I used a variety of stamps by Lavinia Stamps and Inkylicious. To start, I die cut 2 hearts, one scalloped and one plain edged, and some masks from sticky notes.  I added a moon mask and then blended some Distress Oxide inks to the sky, then removed the moon mask and added some grey to the moon. After stamping some distant trees, I moved the masks down and blended a little ink to create the landscape and added some more stamping.  The bunnies were added and then the scene built up around them using various trees, shrubs and a fence. For the background, I used the Stampin’ Up! Woodland embossing folder and a square of navy card and a few Posca splats. The sentiment was stamped and mounted onto a navy rectangle. To assemble the card, I added some fun f...

Valentine Watercolour

Image
  I’ve been painting this week; a Valentine’s card for Mr L and an actual picture! There are some wonderful YouTube tutorials available for beginner painters and I’m a big fan of Karen Rice’s paintings, style and teaching. My card was a line and wash using another Anita Jeram stamp.  Those rabbits are so cute! I lifted out the paint in the sky to create the heart shaped clouds. When I die cut the panel, I had to use the partial die cutting technique and the die marked the panel so I had to add the ribbon, which unfortunately hides most of the cloud.  I decorated the envelope using a white gel pen. My painting was done following Karen Rice’s Silver Birch Trees Step By Step video.  I was first drawn to this particular tutorial because there’s no drawing involved.  The trees are masked using strips of tape (I used framing tape) and then the first stage of painting is done over the top.  There are some fun techniques to try duri...