Posts

Showing posts with the label butterfly

Fly High

Image
It’s time for my fortnightly Design Team post and I’m using a couple of products from the fabulous new collection, which will be released tomorrow.   Woohoo!   The style of this new collection coordinates perfectly with the floral collection released back in March.   My CAS card uses the Fly High stamp set and Atmospheric stencil. I started by positioning the three butterflies and sentiments on my square white card panel, stamping with Versafine Clair Nocturne and heat-setting with clear embossing powder.   I do this for two reasons: I like the shine on the sentiments and I can colour using alcohol inks.   I cut the “Fly High” sentiment into two as I didn’t want the horizontal alignment.   I coloured the butterflies using a light and dark shade of purple alcohol marker. This card was to be a CAS design so I only added a light stencilling of the Atmospheric circles using silver ink. To give the butterflies dimension but not weight, I used the same ...

Midweek Make: Butterfly Blooms

Image
The dies that are included with Die-Cutting Essentials special 100 th edition are so lovely that I thought I’d share my midweek make with you.   To broaden my horizons, I went away from my usual style and opted for a grungy, mixed media style card instead.   First, I die-cut the butterflies and multiple sentiments from white card and blended ink over.   To give the die-cuts some support, I placed them back into the negative space whilst blending the colour on. Next, the backgrounds.   Using Distress Oxide Picked Raspberry , Peacock Feathers and Uncharted Mariner , I stamped a variety of background stamps from Text{ures} Wildflowers Additions stamp set and blended a little ink around the edge of the panel.   I also added a few sections from Inkylicious Handwritten Script in Ranger  Watering Can ink.   For additional texture, I applied Ranger Grit Paste through Visible Image Mesh It Up stencil and, once dry, blended a little more ink over i...

Butterfly Floating Window

Image
You may remember the Christmas floating window card from a post back in September 2020.  This time, I thought I’d try it out in portrait layout.  As the acetate panel is larger than in landscape format, it’s a bit flimsy but this problem can be remedied by adding a decorative element on top, joining all three sections together. My card base was my standard size of 11½” x 4¼”, scored at 5¾.  I then cut off 1½” off the bottom and cut the card base at 1½” after the score line.  I used some (retired) mercury acetate for the window and cut some mats for the small card sections. For my decorative element, I die cut the SU! Butterfly Beauty dies using white for the base layer and the retired Lovely Lipstick foil for the top layer to really make the butterflies pop. After dry embossing the green mat layer, I assembled the card base, gluing down the mats and attaching the acetate behind. I added some layers inside and embossed the envelope flap wit...

Gift Card Holder

Image
Gift cards are a marvellous invention!  They’re easy to post/transport and recipient gets to buy exactly what they want.  Win, win!  What they are not is very inspirational to look at.  A lovely handmade gift card holder solves this problem.  The beauty about these is that the theme can be changed to suit any occasion so are great for birthdays, Christmas, thank you, congratulations etc., the list goes on.   Here’s how it’s done. You will need: 4⅛” x 10½” card base, scored at 2¼” and 5” 3⅞” x 5¼” card liner 3⅞” x 2½” patterned paper/DSP/card 4¼” x 2¾” mat layer (same colour as card base) 4” x 2½” card front At the end of the card base with the extra score line, mark the centre of the short edge of the card base and use a punch to cut out a semi-circle. Apply Tear ‘n’ Tape along the top and bottom edges of the section with the punch out, just to the first score line.  Remove the backing from the tape pieces, fold down and press the edges w...

Rainbow Butterfly Beauty

Image
      The Stampin’ Up! Butterfly Beauty die set has everything you need to cut out lots of butterflies.  I particularly like the two large dies that can be used individually or layered on top of each other. I started by cutting out the two layers in Whisper White and Lovely Lipstick and stuck them together.    To add further dimension and interest, I added Dimensionals on the back… …and then mounted the whole thing on a Smoky Slate layer embossed with the Layered Leaves (retired) embossing folder and then onto a Basic Grey cardbase. After making this card, I wondered how it would work making an inlaid butterfly, like I did previously with the retired (sniff!) dragonfly from the Detailed Dragonfly die set.  As you’ve probably realised about me by now, I like a bit of ink blending so I inked up a panel in a rainbow palette.  Top tip for these dies: stick some double sided craft adhesive sheet on the back of your card before die...

Butterfly Gala

Image
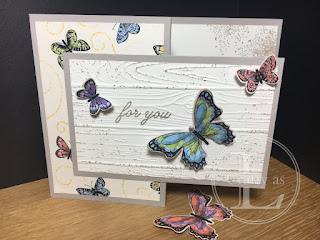
As the weather has been superb this week, Mr L and I have been spending quite a lot of time out in the garden and in greenhouse, sowing vegetable and flower seeds.  I love the potential of this time of year; the bright green buds of new leaf growth, tiny new shoots emerging through the soil together with the amazing colour variety of spring flowers.  The insects are also emerging.  It’s lovely to see lots of bees and butterflies flying around, although our pussy cats’ favourite game at the moment is catching (and eating – gross!) butterflies, much to my chargrin.  To compensate for our cats’ antisocial behaviour, I have sown a multitude of flowers that are attractive to butterflies and bees, providing lots nectar and pollen for them.  It’s the least I can do! Butterflies are the subject of my cards this week, using the Stampin’ Up! Butterfly Gala stamp and accompanying punch and the Crackle Paint background stamp. I began by stamping and punching out the butt...