Posts

Showing posts with the label hearts

Somebunny Loves You!
Image
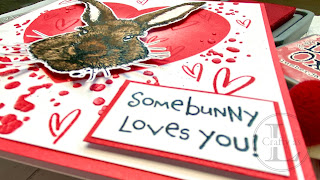
Welcome to my Visible Image DT post and, as Valentine’s Day approaches, I’ve gone all romantic!   You could easily make this a non-Valentine’s card though by switching up the colour scheme. To begin, I blended Lumberjack Plaid Distress Oxide ink through the Heart Ink stencil, with heavy coverage on the edge but blending out to leave the centre white.   Next, I placed the heart stencil into the aperture and applied Nuvo Crackle Mousse Rose Hip through the holes.   The panel was set aside to dry fully and develop the crackle. The main focal element was to be the large bunny from the Happy Bunny stamp set.   I stamped the bunny with black Versafine, added clear embossing powder and heat set.   He was then water-coloured and fussy-cut once dry. The sentiment was stamped and clear heat-embossed then trimmed.   I cut another panel slightly larger than the sentiment to back it.   Lumberjack Plaid was blended around the edge then the sentiment adhere...
Pride Wedding

Image
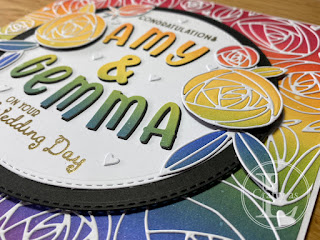
  Last weekend, we had the pleasure of attending our friend’s daughter’s wedding.   My friend commissioned a card for the happy couple with the theme “gay pride wedding with rainbows” so I began by blending inks in a rainbow pattern over a 7½” square panel.   I spritzed the panel with a little water to give a distressed look.   I die cut a circle from the centre of the panel and set it aside for later.   After sticking some adhesive sheet onto the back of some white card, I die-cut a load of the elements from Altenew Rolled Roses and arranged them onto the panel, removing the insides and sticking the outlines in place.   I trimmed off the overhanging pieces.     Using some more adhesive sheet, I die cut the ladies’ names using Henry’s Alphabet dies by Lawn Fawn and some more of the roses, from the circular cut out.   The letters were cut out again from black card and offset behind the rainbow letters.   The sentiments were heat embos...

Another Mice Wedding

Image
  The Colorado Craft Company Happily Ever After features a scene and critters created by Anita Jeram and is a lovely set but can’t really be used for anything else but weddings.   I bought it last year, as I was going to 2 weddings, so it was good to be able to use it again for this commission. To begin, I stamped the scene and the wedding couple and coloured with Copic markers and coloured pencils.   The bride and groom were die-cut, together with a small gift.  The main requirement I’d been asked to include was the bride and groom’s names.   I used My Favourite Things Stitched Alphabet Banner dies to cut out their names.   There isn’t an ampersand so I used a tiny heart die for between the names. I like the main scene in this set but when it’s all coloured in, I feel that the bride and groom get a bit lost so I played around to see if I could make that more of a background by creating a frame around it.   I don’t have any large frames that are ...

A Very Mice Wedding

Image
Do you remember the wedding invitations from a few weeks ago?  This week’s blog post is the card I made for the actual wedding.  For my card, I used Waffle Flowers Slim Lacy Layers Dies and Colorado Craft Company Happily Ever After stamps and dies. After cutting out the white layer, I decorated it by blending through a randomly placed heart template. Next, I stamped the bride and groom and a selection of flowers and coloured them with Copic markers. The final job was heat embossing the sentiment and assembling the elements.  I glued the flowers onto the card but popped the couple up on foam squares.  Lastly, I added a few white heart embellishments around the bride and groom. Lastly, I used the smaller stamps to make the card for the gift vouchers.  This card was not as wide as the slimline dies so the panels were cut down using the partial die-cutting technique.      

Happy Hearts

Image
  I love making cards for a special occasion so when Mr L requested a card for his friend who had just got engaged, I went straight to work.  Hearts are perfect for engagement and anniversary cards so I used the Stampin’ Up Detailed Hearts Die (now retired), which is great for 2 for 1 cards as you can use the frame on one card and the hearts on another! To begin, I added a sheet of Stick-It adhesive to the pink card and cut two using the die.  The adhesive makes it much easier to stick down thin die-cuts like this but before doing so, I glued one on top of the other to give a stacked look. Next, I adhered this onto the card base and inlaid some white hearts (left over from a previous use of this die!) to give a pop.  I also stamped the sentiment. As there were a LOT of self-adhesive hearts created by the two die-cuts, I used some for the card liner and envelope. For the final assembly, I popped the sentiment up on foam squares and added a ...

Floral Frame

Image
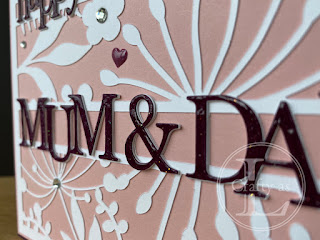
Well, it doesn’t seem like a year since I was creating an anniversary card for my parents’ golden wedding but clearly it is, so it’s also time to create another one!   I had in my mind a floral frame featuring dandelion silhouettes with some lettering on top.  It was clearly a job for the Cricut. I started in Design Space by adding various dandelion, floral and leaf elements and arranging and rearranging them into a square to create my background floral frame. Next, I added two cut out sections so that my letters would stand out more and then added the text.  I went for a bouncy alignment as this allowed the words to be cut as whole pieces (more or less!).  I then cut out the frame and two white versions of the sentiments. I also cut a purple version of the sentiment for the top layer. The reason for the white layers was to build up dimension so the sentiment stood proud of the frame.  I glued the two white sentiments onto the frame and then stuck the pu...

This Little Piggy

Image
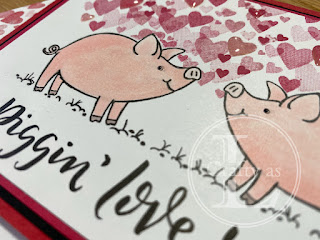
It was Valentine’s Day on Friday and whilst we don’t buy big presents or go out and get fleeced for a distinctly average meal, I do enjoy making a card for Mr L.  He generally gets his crafting on and asks for access to my craft room to make me a card too – which I LOVE! I don’t get many handmade cards.  I’ve just got the This Little Piggy set and thought it would be perfect to use for my card using the mirror stamping technique.  I wrote this  post last March on how to do this technique, if you’d like a refresh. To begin, I mirror stamped my pigs. Next, I coloured them in using some alcohol markers and also drew in some more grass in the gap in the middle to unite the two images. I then stamped the pig on the front and back of a post-it note and cut around them to create two masks. Note: The ink stamped on the adhesive on the back of the note stayed wet for a long time so I repeatedly pressed the adhesive part on scrap paper. Using the bunch of hearts from F...