Posts

Showing posts with the label inlaid die

Three Kings

Image
I’m continuing my mission to make a few Christmas cards for my last blog post of each month.   Today, I’m using an Apple Blossom die set that I got for an absolute bargain in the Craft Stash New Year sale. For my first card, I envisaged a stained-glass window.   To begin, I die-cut the image, and then used a piece of Glad Press ‘n’ Seal to collect all the tiny pieces and hold in place to make it easier to colour in. Next, I used a variety of pens to add colour to each piece. I die-cut the piece from black card and adhered some Stix 2 Anything’s double-sided adhesive sheet to the back.  The coloured pieces were inlaid into the die-cut.  I do love a jigsaw!! To make the panel more window like, I attached a piece of acetate over the top before die-cutting another panel to adhere over the acetate.   The panel was then simply mounted on a white square card blank. This all turned out to be rather labour intensive!   I thought I’d try out a quicker ver...
Magnificent Magnolias

Image
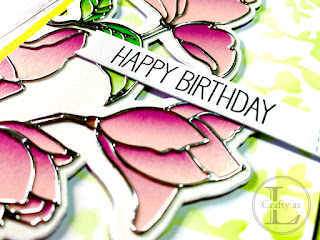
The cards this week use TEXT{ures} Magnolia Half Tone stamp set, dies and washi paper by Lou Collins.   For my first card, I die-cut the outline from dark purple card and also from silver mirror card. After gluing the outline onto a white panel, I inlaid the silver pieces into the design and trimmed off the overhang.  To finish the card, the panel was simply mounted onto a purple card base and topped with a sentiment. Next, I tried out the washi papers, which come in a range of colours. I applied the transfer to a square panel and trimmed off the overhang before adding the silver frame from the first card on top.   You can see the edges of the washi paper as it is a slightly different shade to my card but it looks OK. These washi paper transfers make for really quick but impactful cards.   The image is large so it’s easy to cut in half and create two cards to stretch your supplies.    

Rainbow Butterfly Beauty

Image
      The Stampin’ Up! Butterfly Beauty die set has everything you need to cut out lots of butterflies.  I particularly like the two large dies that can be used individually or layered on top of each other. I started by cutting out the two layers in Whisper White and Lovely Lipstick and stuck them together.    To add further dimension and interest, I added Dimensionals on the back… …and then mounted the whole thing on a Smoky Slate layer embossed with the Layered Leaves (retired) embossing folder and then onto a Basic Grey cardbase. After making this card, I wondered how it would work making an inlaid butterfly, like I did previously with the retired (sniff!) dragonfly from the Detailed Dragonfly die set.  As you’ve probably realised about me by now, I like a bit of ink blending so I inked up a panel in a rainbow palette.  Top tip for these dies: stick some double sided craft adhesive sheet on the back of your card before die...

Forever Lovely Florals

Image
  This week, I’ve been playing with the Forever Lovely stamp set and the coordinating dies, Lovely Flowers. Whilst at first glance, this seems like a Valentine’s set with the hearts and sentiments, it’s actually quite a versatile set and is ideal for birthday, Mother’s Day, sympathy, get well, anniversary, wedding cards or even wedding invitations. To begin with, I just used two of the dies, the fancy floral one and the floral edge one, to create simple two coloured cards bases.  The die produces a small amount of embossing on one side of the image but then cuts the other side to give a really interesting edge to the card.   The next one I tried out was to cut the floral die, then cut it again in two different colours and inlaid the tiny pieces to create a coloured floral panel.  I really like the way this turned out. The different colour combinations really change the feel of the card despite them being exactly the same design.  The inlaid c...