Posts

Showing posts with the label decofoil transfer gel

Nutty Squirrel

Image
Welcome to my DT post and this week, I’ve been busy making an interactive card featuring the Nuts About Squirrels stamps and dies .   I do love an interactive card, particularly one that doesn’t require any specialist dies, which allows you to make it any size you like.   This one was for my husband for our wedding anniversary. To begin, I made a panel to chop up for the background.   I applied Deco Transfer Gel Duo through the  Leafy stencil and left it to dry before placing a Deco Foil green and gold foil sheet over and running it through my Big Shot.   The ‘Duo’ part of the gel is that either pressure or heat can be used to fix the foil so you can use a die-cutting machine or laminator to complete the process. Next, I stamped the squirrel, leaves and acorns and coloured them using a variety of alcohol markers.   After die-cutting them, I added some clear Nuvo Drops to the squirrel’s eye, nose and to the acorns for some extra shine. Now for the ca...
Mistletoe Madness

Image
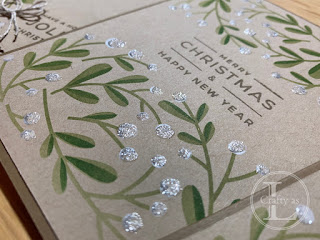
  Do you remember my post last January when I said I was going to try to make a few Christmas cards each month so that it wasn’t all a frantic panic in December?  Well, that lasted all of one month and I made a grand total of 2! Doh!! So, a new year and a new attempt – fingers crossed this one will go better?  I’ve been feeling a bit fed up lately due to not being well so thought I’d treat myself to this stencil set.  It’s by Taylored Expressions, a new company for me, and it’s designed to make mass-producing cards easier as you create 4 backgrounds with the stencil.  It's designed for the US sized version of A4, which is slightly shorter and fatter than the UK version but it works just fine. For the leaves, I blended SU! Old Olive ink through stencil 1 and SU! Garden Green through stencil 2 onto SU! Crumb Cake card.  You can use the same green for each stencil though – that’s what I did for my envelopes as I like to use a waterproof ink on them....

OMG! You're how old?

Image
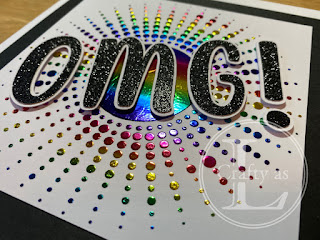
My year of big birthdays is now at an end.  There’ve been five 50 ths (including my own), two 60 ths and one each of 70 th and 18 th .  I bought the Sunburst stencil from Sweet Poppy Stencils as I thought it might be useful for making masculine cards.  Indeed, it was when I made this one. It was whilst I was making this card that I thought it’d be fu n to try it with the deco gel and some foil.  The trickiest part with the gel was the circle in the centre – it’s quite hard to get an even layer of gel over that section.  Anyway, after it dried, I applied some rainbow foil and ran it through the laminator. I never grow tired of the reveal! Next, I got busy with the Cricut and made my letters and backgounds.  I use Inkscape for designing my lettering and the shadow outline is created by making an offset to the text and then import into Cricut Design Space.  There are really good tutorials for how to do both of these things on YouT...

Fabulous Foiling

Image
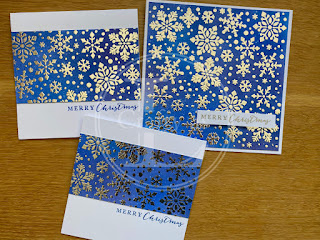
    Recently, my Mum has been diagnosed with Alzheimer’s.  The doctor said that learning new things could be good for her so I invited her and my sister round to make some Christmas cards.  My mojo is still not in full flow so I wanted to something relatively easy so decided to try out a new product I’d bought to make some foiled cards. We started by blending a variety of Distress Oxides to make the background for our snowflakes.  After blending, the card was spritzed with some water to create the distressed look. Next, the Newton’s Nook Snowfall stencil was taped in place before applying a thin layer of Deco Foil Transfer Gel Duo.  The stencil was removed and the gel left to dry, when it will be clear but it is still sticky.  The duo part of this gel means that it can be used to foil either the usual way with heat in a laminator or by pressure using a die cutting machine.  For the snowflakes, I used the pressure method....