Posts

Showing posts with the label dandelion

Diamond Pop-Up Card

Image
  This week’s card is a fancy fold that I happened across on Sam Calcott’s YouTube channel and was intrigued to try it out so used it for a 60 th birthday card I needed to make. To begin, I made a template so I’ve got a guide if I want to make any of these in the future.  I make templates for all of my fancy fold cards.  The dimensions on this are so that it can be made from a UK sized A4 sheet of card.  It can also be made using any size square card blanks, just mark the mid points on the long sides and one end. The whole mechanism is simply made by folding in the appropriate directions (mountain or valley) and gluing the top triangle down onto the base piece. To decorate the triangle base pieces, I stamped and heat embossed in silver the dandelions stamp from Lavinia Stamps on Stampin’ Up! Blackberry Bliss card and layered with a white mat. Next job was to make the topper panel.  I used a hill mask and blended ink to form the landscape, da...
Mooching In The Garden

Image
I’m mildly addicted to Mooch! He’s my new stamp and keeps finding his way onto my makes.  I was just going for a straight forward design with this card, envisaging a cat sat in the garden amongst the plants watching the world go by.  To begin, I cut a piece of scrap paper with a wavy edge and blended some ink to give the ground for the cat sit on. Next, I stamped Mooch and the greeting.  As Mooch looks up and to the left, it made sense to put the sentiment there, as though he is looking at it. To add a little colour, I blended some Distress Oxides in Speckled Egg and Picked Raspberry around the edges, spritzed with a little water to lift some colour and added some splats in Speckled Egg. To make the garden, I stamped the dandelions and thistles silhouettes. Finally, I added a light pattern using the Feather Leaf stencil and shaded around the edges in black. I finished with some black Nuvo Drops on the silhouettes and clear ones in the...

Patient Puss

Image
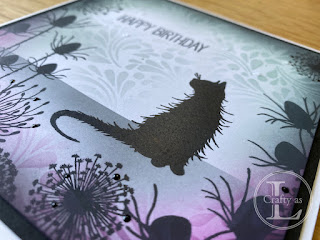
  Like me, my sister is a big fan of cats so, when it came to making a card for her birthday, it called for another outing for Mooch (Lavinia stamps). I’d recently bought a gel press plate for making backgrounds using mixed media so this was a first outing for that – and for me using it! To begin, I brayered some Distress Oxide inks in Weathered Wood and Duck Egg onto the gel plate, spritzed with a little water, then pressed my card onto the plate.  This would colour the moon.  Next, I applied a selection of pink and purple Oxides onto the gel plate, added an acetate circle to mask the area for the moon, spritzed with water again and then pressed the card onto the plate. I wanted the cat to be highlighted by the moon so decided to have him sitting on a wall, made using a brickwork stencil, and then stamped Mooch on top.   The final stage was framing the scene which I did with Dandelion and Thistle silhouette stamps, also from Lavinia.  I the...

Dreamy Dandelions

Image
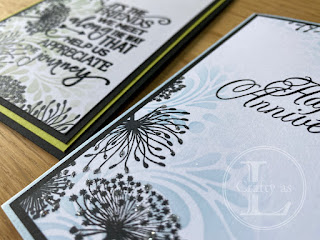
  I’ve not been well for the past 6 weeks or so and as a result, my creative mojo has disappeared.   When I’m empty of ideas, I use other crafters on YouTube to inspire me.  These cards were inspired by Jo Rice’s tutorial for Lavinia Stamps – a recent, new find for me; they have some beautiful stamping goodies! To begin, I stamped the dandelions around two diagonally opposite corners in black ink.  I used Versafine Clair in Nocturne for the first time and I love the intense black of this ink.     Next, I added a touch of colour by stencilling gently with some pale blue ink. To finish, I added a sentiment and heat embossed with some clear powder.  I also added a few tiny dots of glue onto the dandelions and sprinkled on some glitter, although you can’t really see this on the photo. I’ve also been trying out Distress Oxide inks so for my second card, I did the stencilling first as using Oxide ink over stamps, the ink sits on top as...

Beautiful Bokeh Backgrounds

Image
  In case you’re unfamiliar with the term ‘bokeh’, it’s a photographic term for an aesthetically pleasing blur you get when the background is out of focus.  Bokeh is from the Japanese word ‘boke’ meaning ‘blur’ or ‘haze’ and as far as I can ascertain, it is pronounced “bo-kay”.  However, I may be wrong but, irrespective of how you pronounce it, it’s a fun technique to try out. To begin, choose 3 complimentary ink colours and, using sponge daubers or sponge pieces, smoosh ink onto cardstock in random places gradually blending the colours together at the edges.  Leave to dry. Next, you’ll need to make a bokeh stencil.  Cut a selection of circle sizes out of a sheet of acetate or glossy card.  You will need a pigment ink for the circles so that they show up on the coloured background. Using a clean sponge dauber, apply the white ink in circles, moving the holes around the background and overlapping other circles in places.  Leave to dry. The last p...

Dragonflies & Dandelions Card

Image
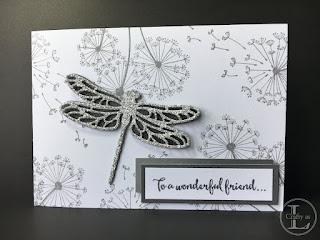
  After spending (erm...wasting!) many hundreds of £££ buying stamp sets that I liked but didn't have any ideas for, I now only buy stamp sets that I can immediately think of 3 projects or cards that I could use them for. This was the case with Stampin' Up!'s Dragonfly Dreams and more recently Dandelion Wishes, the latter being one of my all-time favourite sets.  I thought that the two sets would complement each other well  and decided to use the dandelion stamp to make my version of DSP (Designer Series Paper).  Here's the card.     I wanted a monochrome look so stamped in grey ink but you could use any colours you fancy.  Here's another I made using light turquoise ink and a scrap of ice blue glitter card I found in my large box of card offcuts.  You can really see the wing detail of the stamped image. This is another different look using Crushed Curry and Pumpkin Pie inks together with gold glimmer paper. If you'd like to watch my YouTube v...