Posts

Showing posts with the label embossing

Midweek Make: Safari Creations

Image
My MWM to day features a card I made for Creative Stamping Issue 121.  The stamp set with this isse is HUGE and the cheetah pattern embossing folder is right up my street.   I've not got a written tutorial for you this time (that's in the magazine!) but I do have a YouTube tutorial to share with you showing how I made this funky zebra card.  I hope you enjoy it!   This cheetah card is one of my all-time favourute makes!  It features double embossing, copic colouring, stamping, heat embossing and fussy cutting.   It's a full-on workout! I really enjoyed making this collection of cards. Pop off down the shops now to get your copy of the magazine or order online here .
Here's To You Dad!

Image
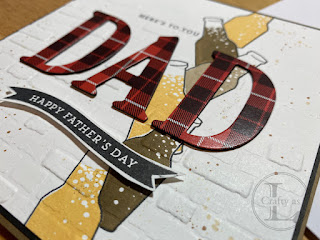
It’s Father’s Day here in the UK so my projects this week are the cards I made for my Dad and my Father-in-Law.  Continuing my efforts to use some older sets I’ve had for years, I pulled out The Man by Avery Elle.  I have previously only used one sentiment from this set so it was time to get creative! My plan was to emboss the front panel but I wanted a little decoration on it.  I stamped the empty bottles onto the sticky part of a sticky note and cut them out on the stamped outline to use as a mask.  I then stamped a series of bottles in a roughly vertical line.   After stamping the bottle outlines, I then used the infill stamp and Stampin’ Up! So Saffron, Sahara Sand and Soft Suede inks to fill the bottles with beer. I partially stamped the HERE’S TO YOU DAD in black ink. I’m really liking the stacked sentiment look at the moment so I die-cut 3 layers to place under each letter.  The top layer was some tartan style paper. The fro...

Fa La La

Image
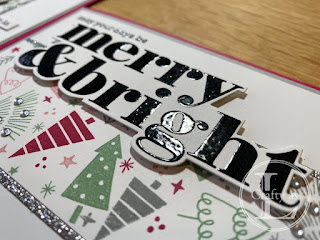
Continuing my mission to create a few Christmas cards each month, I’m back this week with another of Concord & 9 th ’s turnabout stamps, this time the Tiny Trees Turnabout.   The turnabout stamp is stamped 4 times, turning the card 90˚ after each stamp. Top row: 1. Blushing Bride, 2. Mint Macaron, Bottom row: 3. Smoky Slate and 4. Lovely Lipstick The pattern is quite busy so I decided to chop the panel into 3 strips and use the gigantic Big On Christmas sentiments to offset the ‘busy-ness’.  I stamped the sentiments with Versafine Clair Nocturne, heat set with clear embossing powder and cut them out with the matching steel dies. To add some bling, I cut two thin strips of silver glitter card to edge the panel.  The main sentiment is raised on foam squares. I performed some stamp surgery on the small stamp. It said "may your holidays be" but I wanted the words from the White Christmas song so I trimmed off the 'holi' section. The fringe tree ha...

Moonlit Anniversary

Image
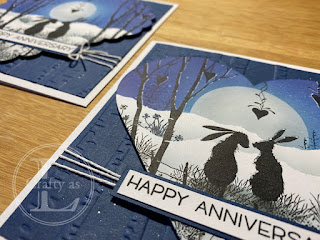
I have quite a few anniversary cards to make during the first 3 months of the year.  These 2 were made for my parents and some close friends – neither of which know each other so it didn’t matter that they were similar.  I used a variety of stamps by Lavinia Stamps and Inkylicious. To start, I die cut 2 hearts, one scalloped and one plain edged, and some masks from sticky notes.  I added a moon mask and then blended some Distress Oxide inks to the sky, then removed the moon mask and added some grey to the moon. After stamping some distant trees, I moved the masks down and blended a little ink to create the landscape and added some more stamping.  The bunnies were added and then the scene built up around them using various trees, shrubs and a fence. For the background, I used the Stampin’ Up! Woodland embossing folder and a square of navy card and a few Posca splats. The sentiment was stamped and mounted onto a navy rectangle. To assemble the card, I added some fun f...

Mistletoe Madness

Image
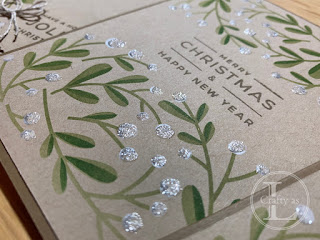
  Do you remember my post last January when I said I was going to try to make a few Christmas cards each month so that it wasn’t all a frantic panic in December?  Well, that lasted all of one month and I made a grand total of 2! Doh!! So, a new year and a new attempt – fingers crossed this one will go better?  I’ve been feeling a bit fed up lately due to not being well so thought I’d treat myself to this stencil set.  It’s by Taylored Expressions, a new company for me, and it’s designed to make mass-producing cards easier as you create 4 backgrounds with the stencil.  It's designed for the US sized version of A4, which is slightly shorter and fatter than the UK version but it works just fine. For the leaves, I blended SU! Old Olive ink through stencil 1 and SU! Garden Green through stencil 2 onto SU! Crumb Cake card.  You can use the same green for each stencil though – that’s what I did for my envelopes as I like to use a waterproof ink on them....

Heart Turnabout

Image
My energy levels have been seriously depleted since my surgery last October.  It’s been really difficult just getting through each day so the tank’s been empty when I’ve tried to get creating.   So, when I saw this stamp, I figured it just designs itself, all I’ve got to think of are the colours.  The stamp is from Concord and 9 th and they have a range of these turnabout stamps, designed to be used with a stamping platform. Starting with a 5¾” square piece of card, I stamped my first colour. The card was then rotated 90° and stamped 3 more times.  You can use whatever colours you fancy, maybe adding a layer of embossing powder for some extra bling. Since the stamped backgrounds were essentially the card, I wanted the sentiment to be the focal image so used Happy, Happy, Happy from Lawn Fawn, heat embossed in white onto black card. The sentiment was mounted onto a stitched circle die-cut and the card finished with a few sequins....

Anniversary Minis

Image
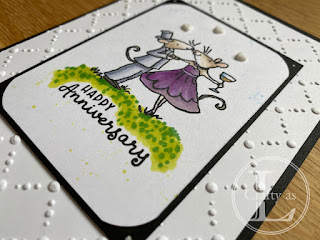
  Another new Colorado Craft Company Anita Jeram stamp is the feature of my post this week, this time the Anniversary Mini.  As the name says, it’s a small stamp but very cute! To begin, I stamped the image and sentiment and then coloured with Copic markers, flicking a few splats from the markers onto the background. I had planned on a ‘white on white’ but the uber plain wasn't grabbing me so I dry embossed the mat layers. To finish the toppers, I rounded the corners with the Crop-o-dile and backed with black card. The mat and topper was then mounted on a black card base and some heart embellishments added.      

Frosted Floral Farewell

Image
It’s time for the new Stampin’ Up! catalogue and I’m sad to say that a lot of my favourites are out 😞  Two of my faves are the First Frost stamp set and coordinating Frosted Bouquet dies.  Whilst these will be disappearing from the catalogue, they’ll not be leaving my personal collection any time soon.  There are two cards on the post this week, the second one was inspired by the liner of the first! Just goes to show that inspiration comes from all sorts of places. First, I stamped and die cut a selection of flower and leaf images and heat embossed the sentiment on a pretty label punch. I repeat stamped the thistle image on a Mint Macaron card front and dry embossed with the Layered Leaves.  At this point, I realised that the card base wouldn’t be sturdy enough so I cut it down to make the front panel of my card. The next job was to arrange the flowers and foliage elements around the sentiment to create my focal image. I stamped the liner and envelope by stamp...