Posts

Showing posts with the label shaped cards

Making Shapes

Image
The brief for my Visible Image DT post this week was to make shaped card and to use stencils.   My last post used stencils to do embossing but this time, I’m using them in their traditional role.   For the shaped card base, you can use almost any shape and layering die sets are particularly useful for this. To begin, I selected two dies for each card, one for the card base and the other for the decorative panel. I cut the heart panel and blended Wild Honey and Picked Raspberry Distress Inks through the Entwined Butterflies stencil and set it aside to dry. For the next panel, I blended Spiced Marmalade Distress Ink through the Lava stencil. The next stencil, The Cat’s Whiskers was placed over the top and Gathered Twigs Distress Ink blended through the gaps. After peeking under the stencil, the cat’s face didn’t seem to stand out enough so I went over the face using texture paste in black for the face and gold for the eyes. Once the pastes were dry, I outlined t...

Love Bunnies

Image
I’ve been looking through my stash lately and have rediscovered the lovely Anita Jeram stamps by Colorado Craft Company.   I enjoyed the colouring I did for last week’s card and needed an anniversary card so Lots of Love was just the ticket. As usual, I began by clear heat-embossing the image.   Whilst I do have a hybrid ink pad, which is suitable for use with alcohol markers, I prefer to heat-emboss. I used the package images for colour inspiration and then cut the bunnies out using the matching die.    Whilst I was at it, I stamped and clear heat-embossed the sentiment and cut that out, together with another three so I could stack them together. As this was an anniversary card, I decided on a shaped card and die-cut some hearts.   I stamped some hearts from an old Stampin’ Up! set around the white heart in ink to match. To make the card base, I die-cut two green hearts.   For the back one, I scored about ¾” from the top to make the hinge and trimm...

Lilies With Love

Image
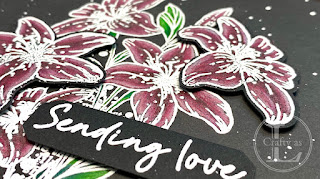
Welcome to my latest Visible Image DT post.   This week, I’m using the brand-new, gorgeous Lilies With Love stamp set which also has  coordinating dies for the lilies. Since I was going to use the ‘Sending Love’ sentiment, I opted for a heart-shaped card.   White embossing powder on black card is very dramatic but also shows any stray powder so I liberally applied my Embossing Buddy before stamping with Versamark ink.   I applied Wow! Opaque white embossing powder and heat set it.   I also stamped the flowers too, ready for die-cutting later.   As I was going to colour with pencils, I coloured the flowers and leaves first with the white pencil from my Faber-Castell Polychromos set. Next, I selected 3 or 4 shades of coloured pencils for the leaves and flowers. I started with the darkest colours and worked my way to the lightest, finishing with a little white on the edges. After die-cutting the two largest flowers, I realised that there was quite ...

Noughty Minion

Image
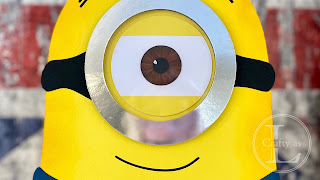
  This week saw Mr L celebrate a “noughty” birthday – the ripe old age of 40! He is a massive Minions fan so, having moved my Cricut Maker into my craft room, I purchased a SVG cutting file from Etsy to make a Stuart the Minion card. To begin, I scaled the file so that the card would be approximately A4 sized and cut out all the pieces, cutting an extra body for the back of the card.   I cut the mouth and hair from vinyl   since they were quite skinny. To give the Minion some definition, I blended some ink around the outside of the body, the dungarees and the dungaree pocket. All the bits were adhered in place and he really started to come to life. For the eye, I added some different shades of brown alcohol markers onto the iris and a white highlight onto the pupil. The goggle was backed with acetate and I used foam tape to adhere it onto the face.   I’d thought the card was finished then but realised there was no differentiation between the body and the ar...