Posts

Showing posts from May, 2023

Beary Good

Image
Last post of the month is my Christmas Card Mission and my makes this week are inspired by a card made by Elisabeth Lainey that I saw on Pinterest.   The bears are MFT Polar Bear Pals and I began by partially stamping them and just colouring the scarf.   I then let my Scan N Cut fussy-cut them. Meanwhile, I looked through my stash and gathered a selection of festive foliage, stars and snowflake dies and cut a bunch of these from green and silver glitter card. The sentiment in the set reads ‘Have a Beary Good Birthday’ however I used the Christmas sentiment from MFT Greetings Galore, which uses the same font.   After stamping the greeting, I used MFT Stitched Triple Peek A Boo window dies to cut the holes in the panel. After arranging and gluing in place the bears and snowflakes, I cut a piece of patterned paper and adhered it behind the windows. Lastly, the panel was matted on red card and then onto a side-folding card blank. Three more to add to the collection.  Have you s

Biscuit anyone?

Image
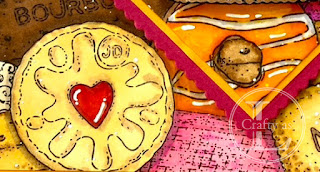
Just a quick post today to share with you one of my cards that I made for Creative Stamping issue 122.   My brief was to show the masking technique and different ways to colour stamps.  This one was coloured with Copic markers but I also used ink blending, coloured pencils, watercolour and ink ‘smooshing’ to create the others. I had a lot of fun creating these biscuit and cake themed cards. The afternoon tea stamp set that comes with the magazine comprises a huge array of biscuits and cakes plus some crockery. If you don’t have one, get your magazine here . The biggest honour though was getting the cover photo for one of my cards! This is the highlight of my crafting journey so far.  

Tartan Tabbies

Image
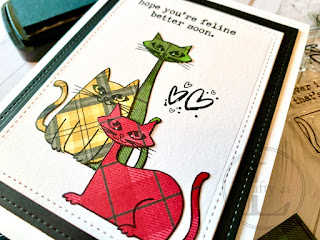
My card this week is a get-well card for my friend who’s had several eye operations, the latest of which was last week.  My friend likes cats and also moved to Scotland a few years ago, so that was my theme sorted. The set I used is That Lovin’ Feline by Visible Image. To begin with, I stamped three of the kitties onto tartan-style paper and fussy cut them. Next, I used the cut-outs to arrange the layout for the card.   Once in position, I placed the stamp on top, closed the lid of the Misti to pick up the stamp, removed the cats and then stamped the image.   This procedure was repeated for the other cats. Since I only needed the stamping for the whiskers and it didn’t matter that the cats would overlap each other, I didn’t bother with masking. The cats were paper-pieced and glued in place and I filled in any whiskers on the cats themselves with a fine liner.  The panel was layered onto black stitched rectangle and then glued to the card base.

Wildflowers

Image
This week’s card is a ‘twofer’ – two for one - and is a quick, straightforward make.   I used TEXT{ures} Wildflowers die for these cards and you can switch up the colours or basic shape  as you prefer. I started with 4 pieces of card, 2 white and 2 navy, which I’d blinged up with a little spray glitter.   After cutting the die from white and navy card, I then glued each panel onto the opposite solid panel. Next, I taped 2 circle dies together and die-cut the circles from both panels. To back the flowered panels, I used stitched circle dies. The centre panels were mounted on foam tape and finished with a sentiment and some rhinestones.   The circular card was made the same way as these cards .    

Super Sunflowers

Image
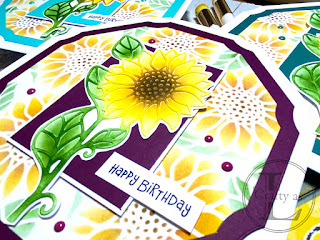
My cards this week were made using the fabulous sunflower die that came with Issue 102 of Die-Cutting Essentials.   I was particularly taken with the octagonal card on the front cover, made by Nicky Gilburt, editor of Creative Stamping.    First, I die-cut the sunflower and used it as a stencil to create the backgrounds. Next, I stencilled again onto another piece of white card.   Then I trimmed around the sunflower outline and glued it over the stencilled flower. Using the nested notched octagon dies by Creative Craft Products, I die-cut the background panels, then a coloured layer.   The card base was a 7” square card blank that I simply die-cut. The sunflower toppers were fussy-cut and then mounted on a coloured rectangle to match the coloured layer.   This was then adhered to a white rectangle. The cards were finished by attaching the sunflower topper using foam tape, adding a sentiment and embellished with some enamel dots.