Posts

Showing posts with the label gold

Midweek Make: Butterfly Blooms

Image
The dies that are included with Die-Cutting Essentials special 100 th edition are so lovely that I thought I’d share my midweek make with you.   To broaden my horizons, I went away from my usual style and opted for a grungy, mixed media style card instead.   First, I die-cut the butterflies and multiple sentiments from white card and blended ink over.   To give the die-cuts some support, I placed them back into the negative space whilst blending the colour on. Next, the backgrounds.   Using Distress Oxide Picked Raspberry , Peacock Feathers and Uncharted Mariner , I stamped a variety of background stamps from Text{ures} Wildflowers Additions stamp set and blended a little ink around the edge of the panel.   I also added a few sections from Inkylicious Handwritten Script in Ranger  Watering Can ink.   For additional texture, I applied Ranger Grit Paste through Visible Image Mesh It Up stencil and, once dry, blended a little more ink over i...
Circle Christmas Tree

Image
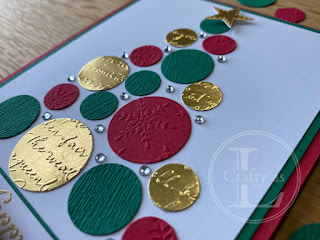
  The idea for this card came from seeing one of those Christmas tree ornaments made from baubles.  It got me thinking how I could make one using circles.  Here’s the result!  I think this would be a fun card to make with children. I began by drawing a triangular tree shape on my card top layer.  I used a tree stamp but any rough triangular shape will do.  Then, after dry embossing a selection of card in Shaded Spruce, Real Red and gold foil, I punched circles of various sizes.  If you wanted to use die cut circles, you’d have to cut first then emboss. The circles were roughly arranged in the tree shape.  To help me remember the placement for gluing, I took a quick shot of the layout and then removed the circles to erase the triangle. I glued all the circles in place, stamped and heat embossed my greeting, mounting it on a layer of Shaded Spruce and a length of Real Red ribbon.  To finish, I added a die cut star to the top on foam tape a...

Glitzy Golden Forest

Image
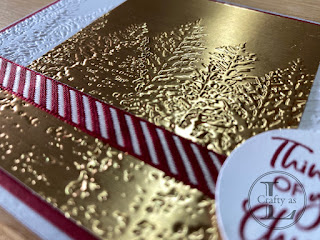
This week’s star of the show is the Stampin’ Up! Evergreen Forest 3D embossing folder.  It’s super detailed and has so much dimension that it deserves to be the focal point of the card.  I paired it with the new Brushed Metallic cardstock for added glitz! To begin, I embossed a top layer of white card and a skinnier panel of metallic card.  I deliberately made my metallic panel longer so that I’d have some wiggle room when assembling the two together. As the embossing is so deep, it’s easy to ‘feel’ when the panels are aligned and the branches match.  Once aligned, I glued first the top half, holding the bottom in place, then lifted the bottom to adhere that.  I used lots of liquid glue to get into all the nooks and crannies of the trees.  Once dry, I trimmed off the excess metallic card. I wanted a pop of colour on the card so I applied a strip of adhesive tape across the panel to attach some coordinating ribbon. Lastly, I mounted the panel onto a C...

Painted Poppies

Image
I hope this blog post finds you healthy and well.  It’s approaching the end of lockdown week 2 here in the UK but I fully expect that the lockdown will be extended as sadly, the number of Coronavirus deaths is still rising.  I am quite enjoying the enforced staying at home time (in between my shifts) as I can do things as and when I feel like it, taking as long as I want as I don’t have to fit them around other engagements.  My lovely Pilates teacher has taken her classes online too, which I am very pleased about!  I am trying to concentrate on the things I can do, rather than the things I can’t, to stay positive in these strange times.  For example, my hair is getting rather long but I was considering a style change anyway so this gives me a head start – no pun intended! It was whilst I was out sowing carrots in the veg patch that the idea for this card came to me.  Our soil is quite stony so we grow carrots in a large container filled with sieved soil....