Posts

Showing posts with the label coloured pencils

Eye Eye!

Image
This week’s post is something I’ve wanted to attempt for over a year, since I went on my first free-motion embroidery course with Alison Holt.   I fancied trying to stitch a picture of my cat’s eye and the summer challenge from the Chairwoman of my textile group to make something using textiles featuring animals gave me the impetus to get going with it. After overthinking the project, trying to think of the problems I might encounter, I finally just got on with it and figured I’d address them as they arose.   To start, I traced the picture, added gutter to define the sections and then painted with silk paints.   As you can see, the eye was dismal so here was problem one to overcome.   I didn’t want to stitch the eyeball as I wanted it to have a smoother texture. I decided to cut out the eye and do it with some other media.   I snipped the fabric, folded it back to the inside and then stuck the fabric down onto a sheet of self-adhesive dissolvable stabiliser...

Open Studios

Image
Hampshire Open Studios started on 22 nd August and finishes tomorrow.   It’s such a great opportunity to see local artists and their work.   My art group has an exhibition in a local church hall together with some craft stalls and there’s been some fantastic art on display.   I displayed my giraffe eye pastel painting together with a kitten pastel painting that I did from a tutorial by Rob Ballentine , although to be honest, I didn’t watch the majority of the videos as they’re too time consuming.   Here you can see the first stages of the painting, getting down blocks of colour and then putting in the nose and eyes.   I wasn’t sure about the background and regretted putting it in but I think it worked out OK in the end. The next stages were to put in the fur details.   The part of this I found challenging was that the face and the paw were in focus but the leg became less focused and the other front leg was out of focus.   It took close observati...

Prize Tags

Image
Next week is the end of term prize giving for our art group competition.   I’m heading up to Oswestry for another free-motion embroidery course later today so I shall miss it but I’d procured the prizes for the event so I wanted to make some tags for them. Looking through my stash, I could find no stamp set more appropriate for an art group than Color My World by Colorado Craft Company.   I cut two strips of kraft card 2¾” wide plus a tag and stamped them with the various paintbrushes. I coloured them in using my Faber Castell Polychromos coloured pencils. For the bottle tags, I punched a circle from one end and scored a line across.   For the smaller tag, I used a tag-topper punch to trim the fancy top.   To finish them off nicely, I used a corner rounder punch on all the tags.   I decided to add first, second and third to the tags and die-cut the number from glitter card in gold, silver and bronze, backing them with an offset black die-cut. Here are ...

Lilies With Love

Image
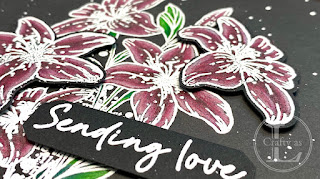
Welcome to my latest Visible Image DT post.   This week, I’m using the brand-new, gorgeous Lilies With Love stamp set which also has  coordinating dies for the lilies. Since I was going to use the ‘Sending Love’ sentiment, I opted for a heart-shaped card.   White embossing powder on black card is very dramatic but also shows any stray powder so I liberally applied my Embossing Buddy before stamping with Versamark ink.   I applied Wow! Opaque white embossing powder and heat set it.   I also stamped the flowers too, ready for die-cutting later.   As I was going to colour with pencils, I coloured the flowers and leaves first with the white pencil from my Faber-Castell Polychromos set. Next, I selected 3 or 4 shades of coloured pencils for the leaves and flowers. I started with the darkest colours and worked my way to the lightest, finishing with a little white on the edges. After die-cutting the two largest flowers, I realised that there was quite ...

Paintbrush Pot

Image
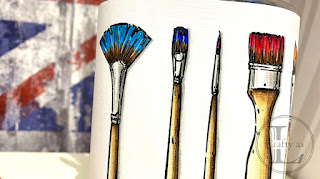
Spurred on by the results of my creative cans upcycling project a couple of weeks ago, I thought I’d do a similar thing for my paintbrush pot, which started out life housing pork scratchings!   It was a first outing for the stamp set, Colorado Craft Company’s Color My World from their Big & Bold range, which was part of my COTY2022 prize.   I was inspired by this fantastic card by My Love For Paper, who also has a great video demonstrating her colouring. My colouring skills are not a patch on hers and I doubted that I could make the brushes look that realistic so I went for black stamped and clear heat-embossed lines rather than the no-line look on her card.   The panel is 14cm x 36 cm, long enough to wrap around my pot. To begin, I coloured the handles and ferrules using alcohol markers.   I realise the irony of colouring paintbrushes with markers and pencils but I didn’t have any watercolour paper that was long enough. Next, to add more definition, I...

Shrunken Pumpkins

Image
Aside from a friendly pumpkin carving competition between the two of us, Mr L and I don’t usually go in for Halloween.   However, I’m rather taken with these Visible Image Happy Halloween pumpkin stamps so I think we’ll be having a bit of spooky décor up this year! This week, I’ve been playing with shrink plastic, a completely new product for me.   It seems most people had a play with it when they were at school but I didn’t! I used the Sizzix white shrink plastic and you can see the difference on size here between the small stamped pumpkin and the shrunken ones. As this involves stamping onto plastic, a non-porous surface, I used Stazon ink.   Some people aren’t comfortable using Stazon on photopolymer stamps but I’ve never had any bother, although I do make sure to clean the stamps immediately after stamping.   To begin with, I used Sharpie markers to colour the pumpkins but when they touched the stamping, they did drag some of the black. I had more success,...