Posts

Showing posts with the label thank you

Daisy Days

Image
It’s time for my Visible Image DT post and this week I’m sharing a card I made for the hospital ward staff who looked after my Mum when she broke her hip and needed surgery.   Mum has advanced Alzheimer’s and the staff treated her with kindness and dignity which I really appreciated. For the background, I had a piece of inky mop-up lying around on my desk.   I can’t remember what I used on it but it’s a combo of yellow and green with some gold metallic on it too. Using the Rotation stencil and Mowed Lawn Distress Ink, I added some stencilling in patches around the panel. I clear heat-embossed the daisy from Daisy Days and fussy cut.   I used the solid petal stamp partially inked and Weathered Wood Distress Ink to add a little colour to the petals.   I used the solid circle to add colour to the centre but decided instead to stamp the flower centre on the little off-cut of inky background and cut that out. To make some stamens for the flower, I wound some ver...

Stripes

Image
Our Visible Image Design Team theme this week is ‘Thank You’.   Do you or your children send thank you cards after Christmas?   This CAS style card would be ideal for making with youngsters and also batch making – if you think Santa’s going to be generous! For my mini-slimline card, I started with a 5½” x 2¾” piece of white card, taping it to my gridpaper, and taped the stripy side of the  Stars & Stripes stencil over.   I then blended Squeezed Lemonade and Worn Lipstick Distress Inks through the stripes. This step is optional but I wanted to add a little shimmer so sprayed some Fossilized Amber and Picked Raspberry Distress Spritz.   I was a bit heavy handed with my spraying so some seeped under the stencil so try to spray a light mist. For the sentiment, I used the Thank You stamp set and did a bit of ‘stamp surgery’ as the font size suited the design better.   I simply trimmed carefully along the flat parts of the stamp between the letter...

The Cat’s Pyjamas

Image
The Waffle Flower Cattitude stamp set was still out on my desk from one of my previous posts so when I needed a card for a cat-lover, that was the 'purr-fect' set to use.   To start with, I made my background using Distress Stains in Lumberjack Plaid, Mustard Seed and Broken China plus plenty of water.   I was lucky enough to win a set of 12 Ranger Distress Spritz   sprays in a Facebook competition organised by Country View Crafts and so I tried the Weathered Wood out on my background.   Wow! The amount of shimmer and sparkle is amazing!   Unfortunately, the camera doesn’t pick it up but in real life, it’s gorgeous. I stamped the sentiment from Newton’s Nook Cat-itude in the bottom corner first.   Whilst I usually work in inches, when I’m making DL cards, I use cm instead.   The main panel is 9cm x 20cm and the black backing is 0.5cm bigger.   This made the next step quite simple as I cut a 3cm strip of white card and positioned it in the c...

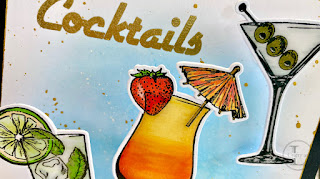
Cheers for Cocktails

Image
You may recall that I mentioned that I retired a few weeks ago and my card this week is the one I sent my workmates to thank them for their generous gifts. For the decorative elements, I used Visible Image’s Cocktails & Dreams stamps and dies, together with the ‘CHEERS’ from Bring On The Beers.   The cocktails were stamped and clear heat embossed. I like to clear heat emboss as it gives me options of how to colour the images and I chose alcohol markers.   My collection of markers is a mixed bunch, consisting of Copic, Spectrum Noir, Prism and Nuvo and I just mix and match.   After colouring, I die-cut using the coordinating dies, although I had to do the martini with partial die-cutting as I’d stamped the olives in the glass. For some glassy effect on the cocktail glasses, after adhering the decorations, I covered the whole glass with Glossy Accents and set aside to dry. Whilst the glasses were drying, I made the background panel by lightly blending Salty...