Posts

Showing posts with the label snowflake

Getting Ahead

Image
Last December turned out to be a bit frantic one way and another and the fact that I had to make most of my Christmas cards didn’t help.   I have therefore decided to take the pressure off and to do what I did a couple of years ago and that is make a few cards each month so my last post of the month will be a festive one.   You may remember the background of the wobbler cards I made at Christmas and I was so pleased with how they looked that I decided to make them the feature rather than the background.   The stamp set is 'Let It Snow' by Visible Image.  After stamping the snowflakes with Versamark, I added Cosmic Shimmer embossing glitter.   I wanted the sentiment to stand out more so stamped that in black Versafine Clair Nocturne but added the same embossing glitter so it had some sparkle. I mainly used the large snowflake but rather than cleaning it, I just use a piece of old packaging as a mask whilst I get the stamp in the right position in my MISTI. ...
Let It Snow

Image
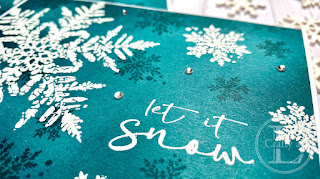
  My last post of the month is my Christmas make.   Card making doesn’t have to be complicated and if you want to batch make cards, it needs to be simple.   That doesn’t mean boring though! I’m still struggling to recover from a virus that I’ve been suffering with for almost 3 weeks so I didn’t have the energy for complicated. Any coloured card can be used for the panel, you just need an ink that is a darker shade of the same colour.   I chose to use a dark teal card with white embossing powder, but again, the choice is yours.   For batch making, a stamp positioner will speed up the process and I used my Misti, even though I was only making two cards.   Using Visible Image Let It Snow I positioned the large snowflake and sentiment in place temporarily whilst I positioned the other smaller snowflakes.   The small snowflakes were stamped in teal ink, the repositioned and stamped again a couple of times. Next, I used a blending brush and darkened the ...

A Winter Cake

Image
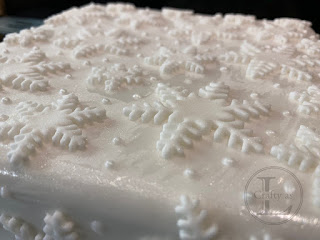
Happy 2021! We made it through 2020 and have emerged into a brand-new year.  Have you made any resolutions? My resolution for this year is to be kind to myself.  I’m a bit of a perfectionist and that leads to me being my own very harsh critic - so I’m now working on not being!  The other thing I intend to focus on is to enjoy whatever it is I’m doing, even if I can’t create a masterpiece.  With that in mind, this week’s post is a Winter Cake.  You may have heard them called Christmas cakes but if they’re not finished until January, it’s a Winter Cake!  It’s true!! With all the food we had to be eaten by less people due to the late Tier change rules, we really didn’t need the cake.  However, we’ve now ploughed our way through the festive goodies and so it was time for the cake to make an appearance. I made the fruit cake way back in October using Nigella Lawson’s Boozy Christmas cake recipe.  I also used a cake belt for the first time.  I...

Snowflake Spinner Card

Image
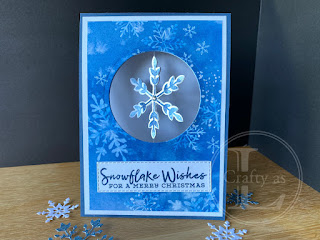
This week’s project is a fun card, giving a little surprise to the recipient.  When the card is opened, the snowflake spins around. Of course, it doesn’t have to be a spinning snowflake, you can use any shape.  I include a star shaped card at the end which looks really cool! To begin, I cut the aperture from the card base and layers.  To get them to line up perfectly, I layered the pieces without gluing, placed my circle die and held them all in place with a post-it note for running through the Big Shot. The card base didn’t cut through as there were too many layers but it did leave an impression so I knew where to put the die the second time around. Next, I stamped my snowflake images and cut them out.  They seemed a little flimsy for my purpose so I cut another 2 snowflakes from thick Whisper White card and stuck one to the back of each stamped image.  I sandwiched a length of beading elastic down the centre of the two snowflakes to make the spinning elemen...

Sparkly Snowflake

Image
  Having bought the Snowflake Splendour DSP, I thought I’d better make an effort to use it!  The pack handily gives the coordinating colours so it’s easy to choose a colour scheme for your project.  I used Balmy Blue and Highland Heather as I like to try some non-traditional Christmas colour schemes for a bit of a change. First, I die cut a circle of Balmy Blue glimmer paper and Whisper White card.  I then cut the snowflake into the glimmer paper using the large snowflake die from So Many Snowflakes and glued this on top of the white circle. The background was cut from a sheet of the DSP and adhered to the card base. I use the stamps from Snowflake Wishes to decorate the card liner and envelope and for my greeting. The last job was to assemble the card, adhering the snowflake element to the top.  I could have popped it up on foam dimensionals but left it flat for easier posting. For my second card, I used Highland Heather and a retired glimmer paper whi...

At An Angle

Image
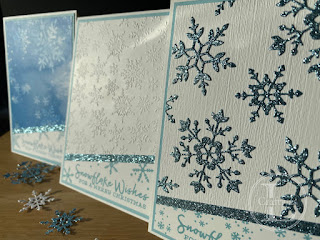
Sometimes, a jaunty angle can really add a new dimension to a project.  When I first tried this card, I cut it straight across and it looked… well… distinctly average.  However, make a diagonal cut and the whole thing is transformed.  I give you three options, depending how much work you want to put in! To begin, I stamped the greeting from Stampin’ Up! Snowflake Wishes on the bottom of my card front, just so I had an idea of how much to chop off.  I found a nice angle if I lined up the bottom right corner with the top of the grid section on my trimmer and the top right corner against the stop rail.  This also allowed me to repeat the cards at more or less the same angle. The top section was embossed using the Winter Snow folder and I covered the join with a ¼” strip of Balmy Blue glimmer paper, trimming the ends flush with the white panel. The whole panel was mounted onto a Balmy Blue layer and then onto a white card base. For an easier option, I cut a p...

Teabag Folded Christmas Tree

Image
Mr L’s parents are going on a cruise over Christmas and New Year.  Since they won’t be at home, they won’t have a Christmas tree so I decided to make them a card with a dimensional tree on it so they have a little Christmas tree in their cabin over the festive season.  Whilst surfing around on YouTube, I watched a great video by Jan Brown on how to make a tree using a teabag folding technique.  I’ve never done any teabag folding so I decided to CASE Jan’s card and give teabag folding a go. I started by cutting out 5 squares of patterned paper (I used Stampin’ Up! First Frost DSP) comprising squares of 1½”, 2”, 2½”, 3” and 3½”.  Since the DSP is only 6” square, I had to use two sheets so went with 2 different patterns. The next step was to fold each piece in half once, and then on each diagonal.  The first folds go down to make valley folds and the diagonal folds push up into mountain folds. The side folds were pushed inwards to make a triangular shape. Ne...

Shiny Super Snowflake Card

Image
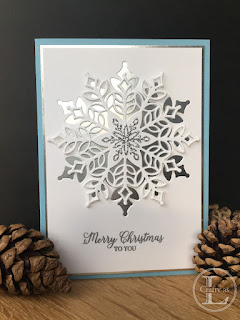
  I love snowflakes, so when I set eyes on the Snow Is Glistening stamp set and Snowfall thinlits which are part of the Snowflake Showcase (the new time limited release from Stampin’ Up!) I just had to have them! For my first card using this set, I opted to use the giant snowflake die as my focal point and to use the negative space as the background.  It’s clean and simple, stylish and effective.....and dead easy to produce! The Snowfall Thinlits die set is huge and includes loads of different sizes of snowflake, a snowflake flourish and some leaves and berries - 20 dies in all.  To complete the showcase, there are two coordinating stamp sets; Snow Is Glistening, Happiness Surrounds, flocked paper and other accessories.  This suite of dies and stamps is only available to purchase from 1-30 November so if you like the look of it, you’d better get your skates on! For this card I used: 11½” x 4⅛” Balmy Blue card base, scored at 5¾” 5⅝” x 4” silver foi...