Posts

Who Doesn’t Love A Rainbow?
Image
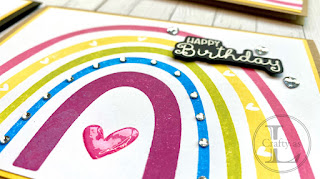
This week has been a strange one for me.   It’s the first time in 33 years that I don’t have a job!   I took early retirement and my last day of controlling aeroplanes was on 13 th April, however, I had annual leave to use to take me to my official retirement of 30 th April.   Although I have retired, I’ve done so early and can’t yet claim my pension so I’m technically unemployed!   I thought that this would give me more time to do the things I want but so far, my experience of retirement is that time seems to go twice as fast! For today’s card, I was inspired by a YouTube video by Angelica Conrad, which leant itself very well to making multiples.   This stamp set, a Big & Bold one called Build A Rainbow, by Colorado Craft Company, was another of my winnings that hadn’t yet seen the light of day.     I made use of my MISTI so that I could add multiple pieces of card in the different alignments.   After stamping the standard rainbow arc, I then added a new piece of card in a
Beautiful Bonsai

Image
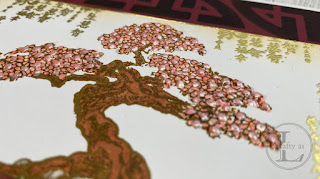
  It’s *NEW RELEASE* time again and for my DT post this week, I’m delighted to be sharing my makes using the Resilient Bonsai stamp set together with 2 of the stencils, Art Spheres #2 and Painted Grid . To begin, I stamped the bonsai using brown hybrid ink so that I could colour with alcohol markers.   This bonsai was to be one full of blossom so I used a selection of pinks and just dotted them around until most of the tree was covered, although I left a few areas white.   The pot was coloured to match the background panel – more on that later! Next, I gold-heat embossed some of the small symbols onto the pot. To finish the panel, I gold heat-embossed the writing randomly and then blended some gold ink around the edge. For the background, I roughly measured where my focal panel would come to so that I could align the half-sphere pattern from Art Spheres #2, which I stencilled using black ink.   Once the ink was completely dry, I gold heat-embossed the sentiment. To add more

Framed Peonies

Image
For this week’s card, I dug out another of my unused winnings from the Cardmaker 2022 competition, this one called Peonies Framed by Colorado Craft Company.   Rather than colouring the stamps directly, I decided to use vellum and here’s how I did it. To begin, I stamped the frame on vellum using Versamark ink and added white embossing powder to one and gold to the other and heat-set them. For easy colouring, I used my Sharpie markers to colour on the reverse side of the vellum.   Sharpies aren’t usually blendable but since ink takes a while to dry on vellum, you can do a little blending.   Colouring on the reverse side also means that you don’t have to be super careful about not going onto the lines. The obvious problem with vellum is the attaching to the card blank so I cut a white panel and folded the edges of the vellum around and adhered them to the back with double-sided tape. I added the birthday sentiment from the set onto the gold card and added a green mat layer be