Posts

Showing posts from July, 2019

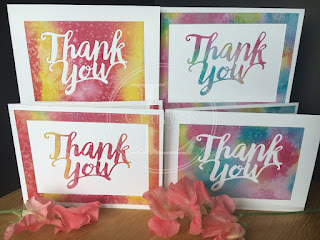
2-for-1 Thank You Cards
Image
Having had fun doing the ink ‘smooshing’ technique for last week’s blog post, I thought I'd try my hand at some watercolour backgrounds this week, although I used calligraphy ink rather than watercolour paint.  I’ve watched many, many YouTube tutorials on making water colour washes but it’s not quite as easy as it looks – well, not for me anyway!  Using the Stampin’ Up! Thank You die, I wanted to use the positive and negative spaces of the background to make 2 cards, hence the 2-for-1 title.  For an even speedier set of cards, use patterned paper instead of making a background. I began by taking my piece of watercolour paper and wetting it thoroughly with clean water.  I then painted stripes of pink and yellow ink and let them blend together.  I then spritzed the piece with some Frost White Shimmer paint (mixed with isopropyl alcohol) for some shine, although the nozzle of the sprayer was a bit iffy so its more splotches than mist! For my second sheet, I wet...
Simple Silhouettes

Image
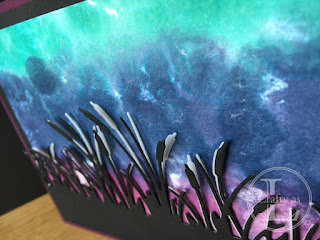
  I do love a silhouette! Trees, plants, buildings, birds, people to name but a few – they all make great silhouettes that are super to use for card making.  Create a background by using your preferred method – sponging, brayering, watercolour, stamping, embossing – and put your silhouette over the top.  When I spotted the Friendly Silhouette Dies in the new Stampin’ Up! annual catalogue, they were immediately put on my wish list.   I mistakenly thought that there were 3 silhouette border dies in the set, and there are – sort of! More on that later though. For two of my cards, I sponged a sunrise and a sunset.  What I like about inking sky backgrounds is that you can’t actually go wrong! For example, if you look at a sunset there are so many colours, shapes and patterns, many of which you’d think were unrealistic if you saw them in a painting but there they are in real life.  That’s one of the beauties of nature, it’s sheer randomness! ...

Splendid Sunflowers

Image
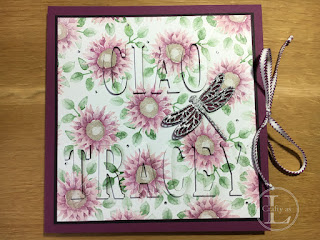
Summer is a great time to be out in the garden: there’s a wealth of colour, flowers, birds and insects to feast your eyes on.  I particularly enjoy growing plants that are beneficial for both me and the wildlife and one of those essentials is sunflowers.  I don’t grow the 10ft monsters for a few reasons; they require too much faffing around with, you only get a solitary flower on them, albeit huge, and our garden is very windy so it would likely get broken.  My favourite sunflower to grow is ‘Vanilla Ice’.  It’s a multi-branched variety, so lots of flowers for the vase and the wildlife, it’s really easy to grow and it flowers for months. A little bee on my 'Vanilla Ice' sunflower The Painted Harvest stamp set features a great water-coloured sunflower image and is also easy to create stunning cards with.  It’s a multi layered stamp and I usually use a second-generation image for the back layer by stamping off onto scrap paper first but with the yellow ink, it’s n...

Beautiful Bokeh Backgrounds

Image
  In case you’re unfamiliar with the term ‘bokeh’, it’s a photographic term for an aesthetically pleasing blur you get when the background is out of focus.  Bokeh is from the Japanese word ‘boke’ meaning ‘blur’ or ‘haze’ and as far as I can ascertain, it is pronounced “bo-kay”.  However, I may be wrong but, irrespective of how you pronounce it, it’s a fun technique to try out. To begin, choose 3 complimentary ink colours and, using sponge daubers or sponge pieces, smoosh ink onto cardstock in random places gradually blending the colours together at the edges.  Leave to dry. Next, you’ll need to make a bokeh stencil.  Cut a selection of circle sizes out of a sheet of acetate or glossy card.  You will need a pigment ink for the circles so that they show up on the coloured background. Using a clean sponge dauber, apply the white ink in circles, moving the holes around the background and overlapping other circles in places.  Leave to dry. The last p...