Simple Silhouettes
I do love a silhouette! Trees, plants, buildings, birds, people to name but a few – they all make great silhouettes that are super to use for card making. Create a background by using your preferred method – sponging, brayering, watercolour, stamping, embossing – and put your silhouette over the top. When I spotted the Friendly Silhouette Dies in the new Stampin’ Up! annual catalogue, they were immediately put on my wish list. I mistakenly thought that there were 3 silhouette border dies in the set, and there are – sort of! More on that later though.
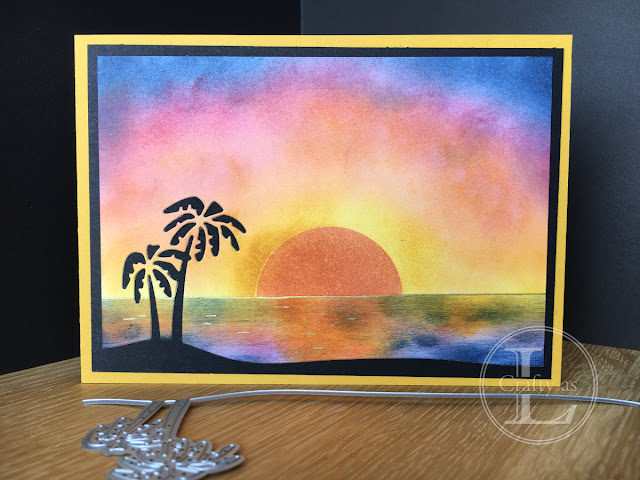
For two of my cards, I sponged a sunrise and a sunset. What I like about inking sky backgrounds is that you can’t actually go wrong! For example, if you look at a sunset there are so many colours, shapes and patterns, many of which you’d think were unrealistic if you saw them in a painting but there they are in real life. That’s one of the beauties of nature, it’s sheer randomness!
I began by sticking post-it notes along the card to make the horizon (1). Then I decided whether or not to have a sun. I had a sun in these so punched a circular mask from a post-it note and used both the negative (1) and positive pieces (3) at different stages. After I’d sponged the sun, I removed the negative mask (2) and then placed the sun mask over the sun (3) whilst I sponged the sky. I used Crushed Curry, Rococo Rose and Seaside Spray for my sunrise sky. I removed the masks and then coloured below the horizon using a Basic Black marker (4).
I cut out the floral border from Basic Black card and simply glued the border over the sunrise. At this stage, I didn’t like the black horizon I’d drawn in so I just covered it up with the border die.
 |
| Floral border at sunrise |
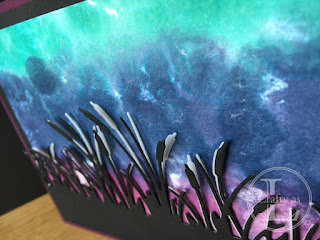
For the second card, I used an ink ‘smooshing’ technique. I got my largest block and pressed my Blackberry Bliss ink pad directly onto the bottom third of the block, transferring plenty of ink. I repeated this with Bermuda Bay on the top third of the block. For the bit in between, I applied Night of Navy using sponge daubers.
Once the block was covered, I spritzed it with plenty of water and then placed the card onto the block, pressed well, then removed and left to dry. The great thing about these types of background is that they are fun to make and are completely unique!
The bull rush border (my favourite!) was used for this card and I cut out an additional border from vellum and stuck it behind the black card, offset slightly to give some extra visual interest.
 |
| Bull rushes border in black card and vellum |
So that bring us to the last die. Now I thought that this was a palm tree border so image my horror when this is what was left when I’d cut out my border! I even contacted demo support to check that the thing wasn’t faulty!!
 |
| Definitely not a palm tree! |
Anyway, another demonstrator in Amanda’s team guessed (correctly) that it is designed so that you use the negative space instead of the cut out. So, you ink up your background scene, then cut out the trees and put your background on top of a black card base to give you the silhouetted look. Now call me picky but I think a background should be, well…you know, in the background and the thing that’s making the silhouette should be in the foreground. Maybe I’m thinking about this too scientifically! Anyhow, this is how it looks behind my inked sunset.
 |
| Palm tree 'border' at sunset |
I’ve left all my cards without sentiments so I can use them for whatever occasion demands in the future.


Comments
Post a Comment