Festive Floating Window
I saw this card style on a YouTube video by Scrimpingmommy and thought it’d be fun to try. As it transpired, I got completely carried away with it and made 4 bases ready for decorating! I used Stampin’ Up! Perfectly Plaid, Stitched Stars and Brightly Gleaming for my decorative elements. Although I've made Christmas cards, this style of card can be used for any occasion.
My card bases are 5¾” x 8¼”, a little less than half a sheet of cardstock, and scored at 4⅛”. For this card, the front needs to be cut into three so I cut mine equally at 1⅜”. For the window section, I cut a piece of acetate 1¾” wide by a smidge under 5¾”. I discarded the centre portion and applied thin adhesive tape to the top and bottom edges of the acetate.
Next, I cut some layers from card and DSP to decorate the top and bottom panels of the card.
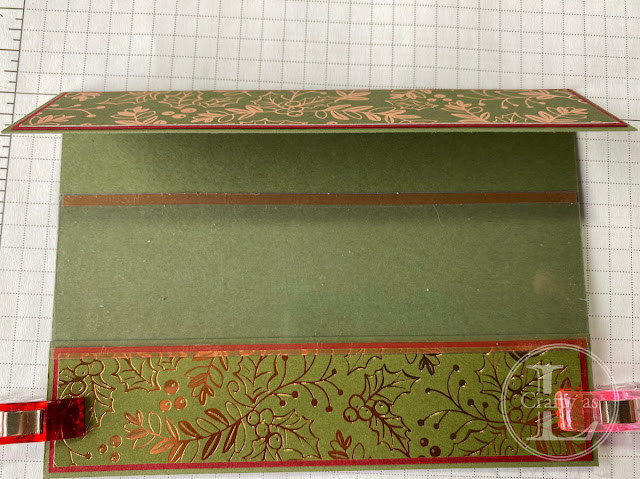
The easiest way to line up the acetate panel is to clip the bottom section to the card base, line up the acetate with the edges of the card and overlapping the bottom section.
Holding the acetate in position, I removed the backing paper from the adhesive and folded the top section of the card down into place. I then removed the clips and stuck the bottom section into position. That completed the floating window card base. Once you’ve got your card ‘recipe’ sorted, you can knock these out in record time!
I decorated the liner with the same card and DSP.
Now for the decorative elements. I only applied glue to the sections that would be on the card so that a gluey mess wouldn’t be visible through the acetate. Firstly, Brightly Gleaming ornaments with copper embossing powder.
Snowflake Splendour DSP with silver heat embossed trees from Perfectly Plaid.
Lastly, my favourite, Brightly Gleaming DSP with copper heat embossed trees.
I hope you give these a try. They're really fun to make and look stunning!


Comments
Post a Comment