Sewing Memories
This Christmas has been a heart-wrenching one for my family as it was the first one without my Mum being present. Sadly, her dementia has progressed such that Dad can’t care for her any longer and she is now being looked after in a local care home. Mum doesn’t recognise any of us now and doesn’t know what Christmas even is. We took the difficult decision to leave her in the home on Christmas Day, where she has familiar surroundings and people, rather than bringing her to our home to be in the company of “strangers” who love her. It’s made for an emotionally-charged time for Dad, my sister and myself.
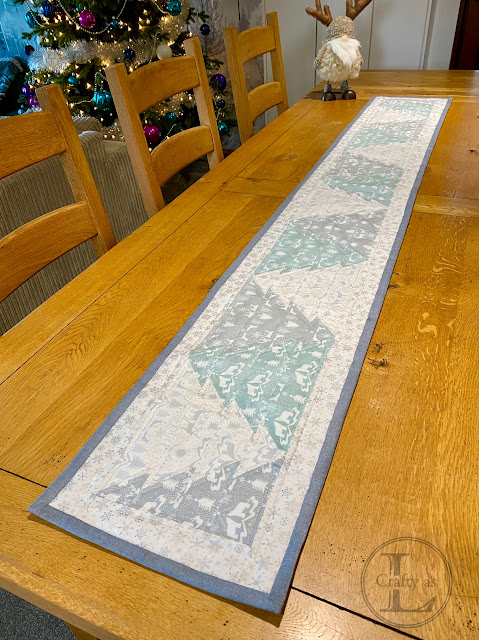
The past couple of times I’ve visited her, she’s not quite been herself, which has been very upsetting to see and it’s really made me miss my Mum. She was a very creative lady and could knit anything! Among other things, she taught me to sew and to use a sewing machine when I was a child so I thought that I could ‘reconnect’ with her through sewing a project. I looked through my stash of Christmas fabric and picked out these Nordic themed cottons to make a festive table runner.
After
searching on Pinterest for a double-sided table runner, I found this excellent free tutorial. I modified my
making of this in that I didn’t make blocks.
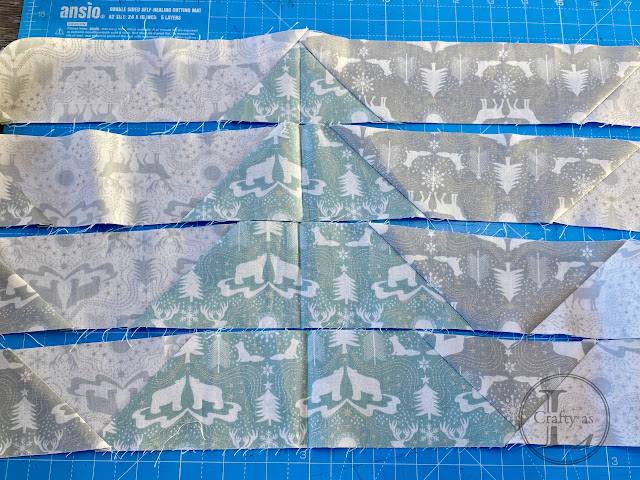
Instead, I made strips as I didn’t want the centre seam in alternate
trees. To begin, I cut all the strips of
fabric and laid them out on my table so I didn't get confused. (It didn't work!)
Then I started on the assembly, working systematically along each row. Each piece was sewn the next with a seam drawn at 45˚to form the branches of each tree. Once sewn, I trimmed off the excess ¼” away from the seam and then pressed with the iron.
Once all four strips were completed, the next task was to join them together. As I didn’t have blocks to join, lining up the trees was a bit tricky. To get around this, I pressed three of the tree sections in half along the runner and used these as markers to keep the trees lined up.
I sewed a border of coordinating fabric all around the edge and then made my “quilt sandwich”. The tree topper, wadding and plain cotton fabric were attached together using Odif 505 temporary adhesive spray and then the quilting began. I was doing this on my sewing machine so I opted for simple straight-line quilting and sewed lines inside each tree, emphasizing the tree shape.
After trimming the layers to nice, neat edges, the final job was the bind the quilt. Since there were no curves to go around, I didn’t need bias binding so cut strips of grey fabric across the width of the fabric and joined them at 45˚. I like to do this as it reduces the bulk around the edge of the quilt when the binding is folded over. The binding was prepared by folding in half and then each half folded into the centre line and pressed.
I clipped the binding in place along the edge, mitring the corners. This is done by:
1. clipping the binding to the corner;
2: folding back the binding at 45˚aligning the fold with the corner of the quilt;
3. folding the binding 180˚ back on itself, lining up with the next edge of the quilt.
The biding is attached by sewing in the dip of the first pressed fold, stopping at each corner prior to the mitre fold. I like to draw a dot where I can feel the fabric below and start/stop sewing at each dot.
Once the binding was sewn to the top, it was folded over to the back, pinned and then hand stitched. A final press and it was all finished.
I
also decided to make some cutlery pockets with another range of Christmas fabric with a similar colour palette. I was very
pleased with my finished Christmas table and I think Mum would have loved it.
Wishing you a happy and healthy 2025!


Comments
Post a Comment