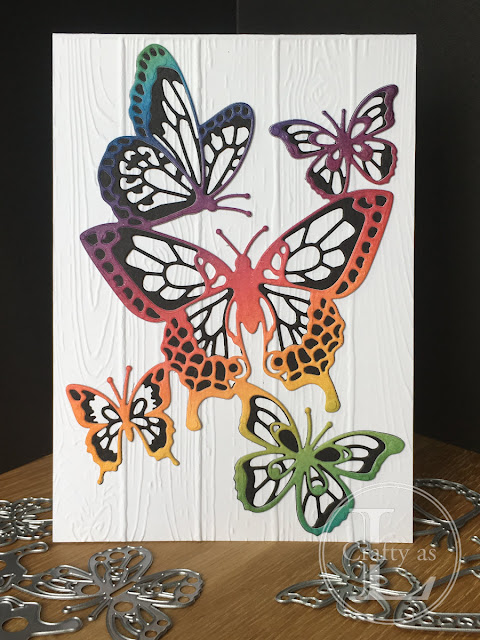
Rainbow Butterfly Beauty
The Stampin’ Up! Butterfly Beauty die set has everything you need to cut out lots of butterflies. I particularly like the two large dies that can be used individually or layered on top of each other.
I started by cutting out the two layers in Whisper White and Lovely Lipstick and stuck them together.
To add further dimension and interest, I added Dimensionals on the back…
…and then mounted the whole thing on a Smoky Slate layer embossed with the Layered Leaves (retired) embossing folder and then onto a Basic Grey cardbase.
After making this card, I wondered how it would work making an inlaid butterfly, like I did previously with the retired (sniff!) dragonfly from the Detailed Dragonfly die set. As you’ve probably realised about me by now, I like a bit of ink blending so I inked up a panel in a rainbow palette.
Top tip for these dies: stick some double sided craft adhesive sheet on the back of your card before die cutting - it saves faffing about trying to apply glue to tiny pieces or thin strips of card.
Using Basic Black card, I cut out each of the two butterfly dies. The first one, I used black for the back layer and cut the top butterfly layer from the rainbow panel. I mounted this on a thick Whisper White cardbase that I had embossed with the planks embossing folder (also now retired!).
Then came to my butterfly rainbow jigsaw! So, this turned out to be much more of a faff that I had anticipated….locating all those tiny pieces.
I stuck the black butterfly top layer onto a white mat and then inserted all the pieces into their matching holes. This was then mounted on a Basic Black card base. It was a very fiddly operation and, to be honest, I’m not sure I’d do another one. However, the finished card looks super!


Comments
Post a Comment