Floating Frames

My cards this week use a technique called Floating Frames, which I saw on Jennifer McGuire’s YouTube channel. She is a very talented crafter and makes everything look so effortless! The technique uses lots of die cuts mounted on foam adhesive to create a frame which looks like it is floating above the card. It has the added bonus in that the process also creates a decorative panel for another card – two for the price of one!
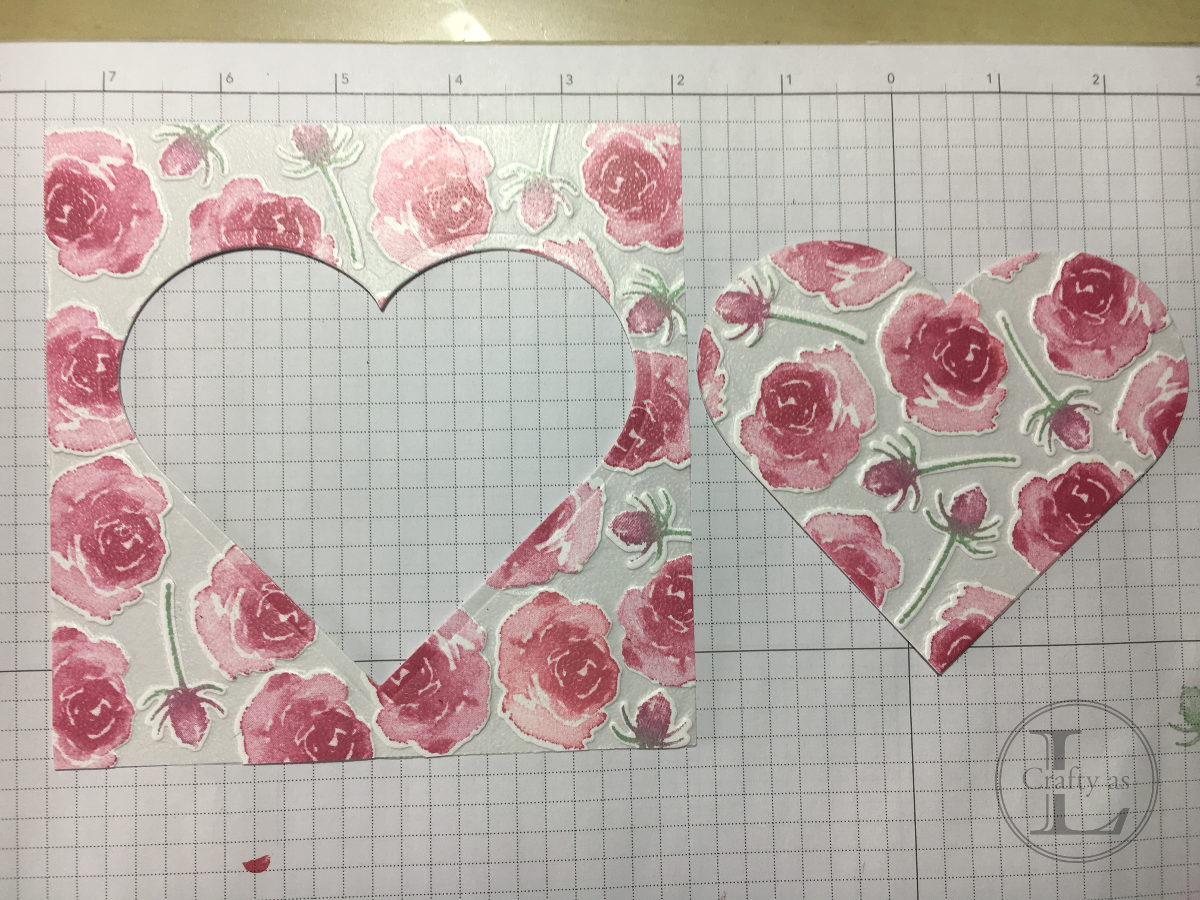
I used the large rose and thistle images from Frosted Florals and their matching thinlits to create my die cuts, using Lovely Lipstick and Mint Macaron inks.

The next step was to position these die cuts over a piece of scrap card cut to the size of my required frame and then covered with a layer of GLAD Press’n Seal (available from Amazon). This holds the pieces in place by temporarily adhering them to the scrap card.

I then cut around the scrap card to create the outside of the frame and then positioned the die to cut out the shape. I used a heart but any shape will work.

This creates the frame and the decorative panel.
The next step was to remove the backing card and add foam adhesive to support the pieces. I had thought that this job was quite labour intensive, however this paled into insignificance when it came to taking the backing pieces off, which took an absolute ETERNITY!!!!

What I did discover was that the piece is quite unstable once the card is removed! It’s almost impossible to lift into position as the film is flimsy and the sticky bits try to stick to each other. I don’t recall Jennifer having this trouble!! Anyhow, I got around it by lining up the pieces face down on my grid paper and then placing the card on top.
The final part is to remove the Press’n Seal. This had to be done slowly as it was quite sticky and the film did leave a tacky residue so I dabbed over the pieces with my Embossing Buddy.

So here are the finished pieces. On the frame, I added some rhinestones in the gaps and a Happy Anniversary sentiment.

For the second card, I added pearl accents into the gaps and left it blank to add an appropriate sentiment at a later date.


Comments
Post a Comment