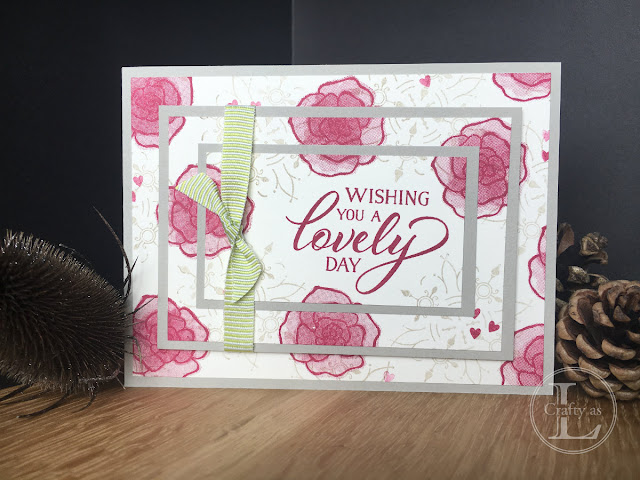
Multi-Layered Stamping
When I first started card making, I was completely flummoxed as to how these kinds of cards were created! Little did I know that it’s actually quite straight forward and just requires some precise cutting of layers but looks super impressive.
I started off cutting my layers, mats and card base as follows:
The next job is to use temporary adhesive to stack up the layers to be stamped. I used a tiny bit of snail adhesive that I patted on my clothes a few times to reduce the stickiness as the layers will need to be taken apart again later without damaging them.
I stamped the greeting onto the front panel and then used an All Adorned stamp (from Sale-A-Bration) and Sahara Sand ink for background interest. As I wanted a light background pattern, I used second generation stamping by stamping off first onto scrap paper and then stamping onto the card layer. I found it necessary to press a little harder that usual to get down the ‘drops’ at the edge of the layers. There was a slight break in the stamping but this would be covered by the mat layers so no need to panic!
The next step was to add the coloured focal element. I used the rose from Forever Lovely and Lovely Lipstick ink. Once this stage was complete, the layers were pulled apart again ready for mounting onto the mats.
A good point to remember is to ensure you don’t inadvertently turn a piece the wrong way up! The images should line up either side of the mat layers. I stuck the largest layer onto the card base, then mounted the top and second layers onto their respective mats.
The top piece was adhered to the centre of the second layer and I added a contrasting ribbon for some added interest. This layer was then mounted onto the card base using dimensional foam pieces.
This card features the large rose from Frosted Bouquet and Bermuda Bay ink.
Here's another version of Frosted Bouquet and Lovely Lipstick, this time on Smoky Slate.


Comments
Post a Comment