Word Art
Pictures made up of words are all the rage now and I’m a huge fan. I hope one day to be able to produce such things with my own calligraphy but for now, I’m happy to use my Cricut to create these works (or words!) of art. I posted my latest project in the Cricut Facebook group and had a lot of comments asking how I did it, which prompted this blog post. Apparently, there is a website or app you can use to arrange your words but personally, I think that takes all the fun and creativity out of the project.
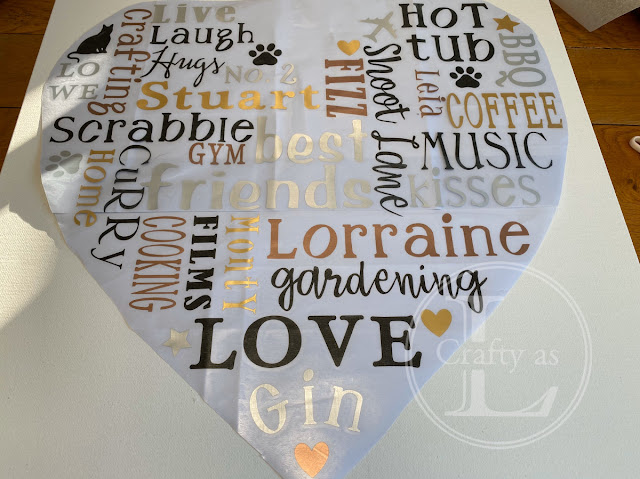
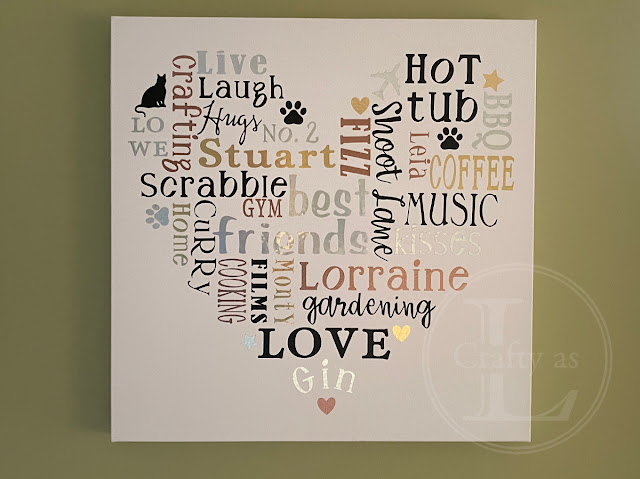
First, I drew in a heart the size of my intended project in Cricut Design Space. I then listed words that I wanted to include in the piece. Then it was simply a job of changing the fonts, sizes and alignments and fitting the words into the heart shape. Where there were gaps too big to leave blank but too small for words, I added little images like hearts, stars, paw prints, cats and aeroplanes. Once I was happy with the layout, I then changed the words and images into 4 colours as I was using black, gold, silver and brushed metallic pink vinyl.
The key at this stage was to “Attach” the images by colours as this allows the Cricut to cut out that colour with the words in the correct position so you don’t have to be bothered trying to line them up on the canvas. As is usual for me, I made my life more difficult by making my project lots bigger than my cutting mat so I had to divide my words into two mats for each colour. After ‘hiding’ or deleting the heart shape (this needs doing to prevent the machine cutting out a vinyl heart too), the next task was to cut out each colour. I cut out the sections of vinyl without any words to save for small projects.
The next job was to ‘weed’ the project. I begin by removing the centres of the O, R, Ps etc.
And then removed the rest of the surrounding vinyl.
The vinyl needs mounting on transfer paper in order to remove the backing prior to sticking to the project. I had some difficulty in doing this from above by placing the transfer paper onto the vinyl, so I placed transfer paper face down on my light pad and then positioned the vinyl into the correct spaces, using the Design Space for reference.
Once all the pieces were in place, I roughly cut the transfer paper into a heart shape to help with centralising on the canvas.
The transfer backing paper was in two halves which helped a lot for the final sticking into position. I lined up the image, then held the top section onto the canvas whilst I peeled off the backing paper of the bottom section, sticking the bottom onto the canvas. With the bottom secured, I then removed the top section of backing paper.
Despite burnishing the images really well, the vinyl preferred to stick to the transfer sheet rather than the canvas so a bit of work was required to encourage the letters off the transfer sheet. Once they were all on the canvas, I burnished them well again to ensure they were properly adhered. The only job left was to hang it on the wall.
I then made a similar canvas for my friend’s big birthday. He is retired now but worked in the aviation industry so I used an aircraft silhouette as my shape to fill. This was trickier as the font was smaller but each colour did fit on a single cutting mat so lining up was easier.
Things I learnt from these projects:
- Don’t use fonts with really long, skinny parts to the letters.
- Do a test cut of a small shape if using new vinyl; they don’t all cut the same.
- Try out the transfer sheet on the project first. Mine was a bit too sticky and the vinyl stuck better to that than to the canvas.
- The smaller the font, the trickier it is to weed and transfer.
- Use “Unlock” to allow words to fill the spaces better otherwise they scale proportionally.
Finally, for a bit of fun, I pimped up our new robovac. In honour of the Robocop being Jean-Claude Van Damme, we’ve named our robovac Jean. I designed a logo for her and added a little slogan! Aside from the fun decals, the little vac is brilliant – in fact, Jean’s busy doing the vacuuming whilst I’m writing this post. Now that’s my idea of housework!


Comments
Post a Comment