Baby Bear
I loved making this week’s card for our friend that had her first baby recently. I don’t have a lot of use for stamps aimed at making children’s cards but I bought the Baby Bear set as you’re never too old for a teddy bear! This is a retired stamp set but I’ve kept mine as I really like that bear and how he comes to life with the three layers of ink. I’ve also got a couple of handy tips on repeat stamping and extending the use of dies.
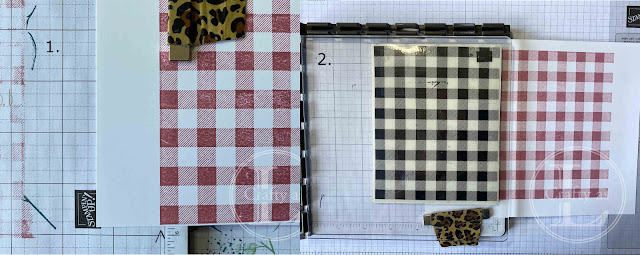
This was a bigger card than usual as I wanted it to be a square Z-fold card. I fancied a gingham style background but didn’t have anything in my stash that was pink so used the Buffalo Check background stamp and some Rococo Rose ink. The stamp was a little small for my background so I used the Stamparatus to do some repeat stamping. I first stamped the check background and marked an arrow on my grid paper where the edge of the stamp came to. Next, I moved the card so that the left-hand edge of the stamped image lined up with the arrow (1) and then stamped again (2). This then gave me a bigger stamped image to centre my cut out.
Next, I stamped the three bear images in 1. Sahara Sand, 2. Crumb Cake and 3. Early Espresso.
To add a bit of extra dimension to him, I applied some fine-tipped glue to his nose and eyes and set aside to dry. This gave his eyes and nose a shiny finish.
I used the sentiments from the set and a stitched rectangle die. This worked fine for the first sentiment but was too short for the second. However, a way to get more from your dies is to only partially cut the die by lining up the top cutting plate before the end of the die. The Big Shot won’t cut where there’s no top plate leaving a partially cut shape. Then simply move the die to the end of the sentiment and repeat the process on the other end of the die.
I mounted the pieces on a Rococo Rose base layer, the gingham layer and the bear on top, adorned with a pink bow.
The inside was layered the same way. Here's the bird's eye view of the finished Z-fold.


Comments
Post a Comment