Fancy Fold Pop-Up Card

Triple cube pop-up cards are all over Pinterest at the moment but what struck me was why the top section isn’t taller. I guess that would make the back section not a cube. Or maybe two cubes? Who knows?! Anyway, this is my version - a tower cube pop-up card. Despite the lengthy instructions, this card is quite simple but it is a bit time consuming.
Stage 1: Making the base card
To begin I cut out my bases, mats and DSP layers. Mats are optional but if not using, cut the DSP in the mat sizes instead.
Base: 6” x 8¼” scored at 2”, 4”, 6” and 8” and two pieces 2” x 8¼” scored at 2”, 4”, 6” and 8” (I trimmed the corners of the ¼” flaps to make assembling neater)
Mats: eight 1¾” x 1¾”, two 1¾” x 3¾” and two 1¾” x 5¾”
DSP: six 1½” x 1½” pieces, two 1½” x 3½” pieces and two 1½” x 5½” pieces.
The fold lines on the bases were reinforced. After gluing the layers together, I adhered them to the appropriate sections on the bases before assembling the cubes by gluing the ¼” flap to the opposite side.
 |
| DSP and mat layers, bases and placement of the mats. On the right, the base assembled |
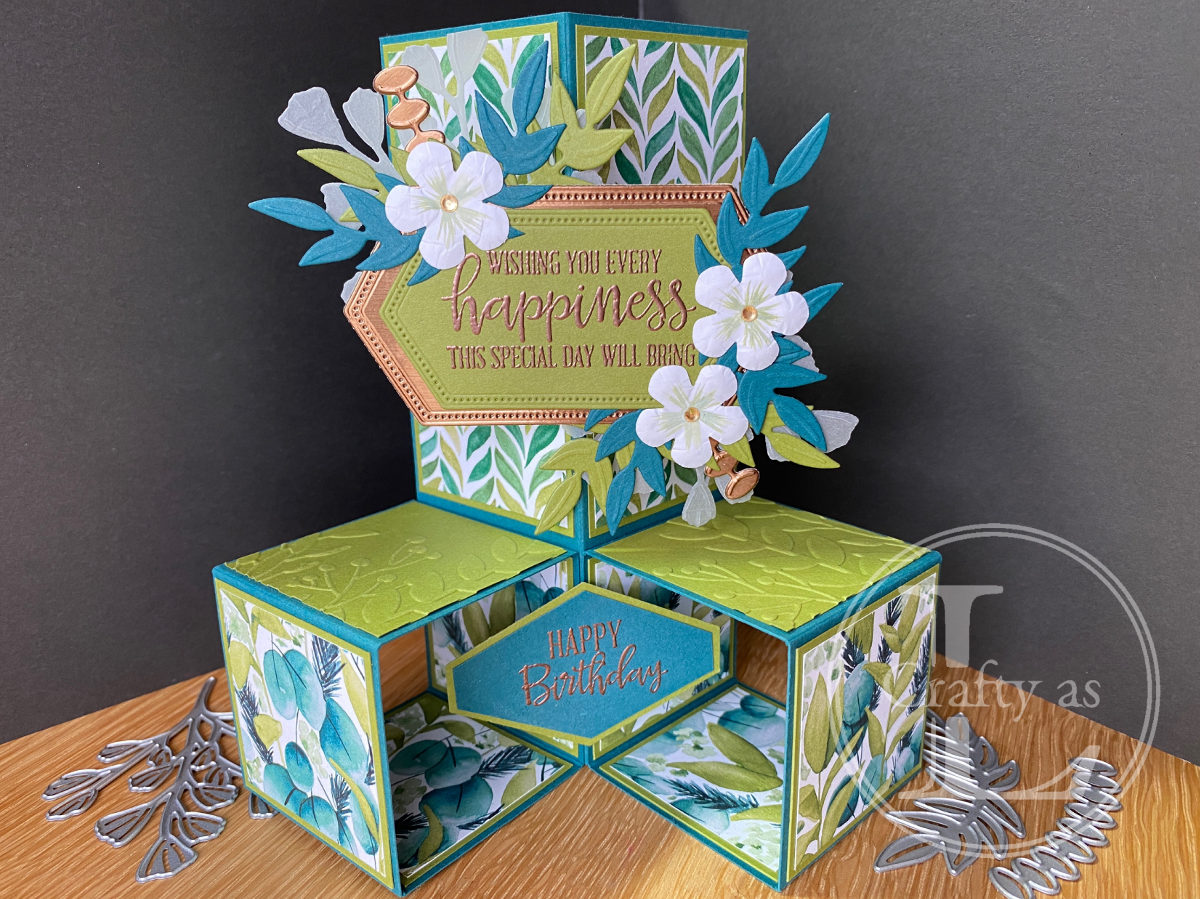
I stamped my first sentiment and secured it so that it floats in the gap between the two cubes by first adhering two small strips to the centre of the cubes, then attaching the sentiment to the other half of those strips.

Stage 2: Making the centrepiece
The space available for the centrepiece is about 4” x 4” although a smidge over will still be OK but if it’s too big, it won’t fit in the envelope! To help me gauge the size, I assembled it on my gridpaper. Also, I was aware of not making it too dimensional (thick!) as the cubes would be folding in on top.
I die cut some stitched nested labels in Old Olive and copper foil paper and heat embossed my large sentiment in copper. Using the Forever Fern dies, I cut various foliage from Old Olive, Pretty Peacock, copper foil paper and vellum. On arranging them, I felt it needed some light so I punched out 3 flowers and gave them dimension using a ball tool and foam mat, first working the petals, the turning the flower over and working the centre

I added a few green highlights in the centre using my Wink of Stella pen and some Old Olive ink before adding some Champagne rhinestone centres.

The centrepiece was layered up and glued in place and I cut another of the large labels from DSP to glue to the back to cover the stems and make it look neater as the back will be visible once the card is displayed.
The final job was to attach the centre piece in the same way as the smaller sentiment was attached earlier.
And here’s proof that it fits into a standard C2 envelope.


Comments
Post a Comment