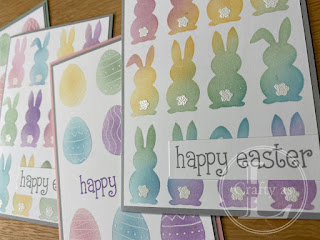
Blended Bunnies
We don’t usually send many Easter cards but with the mad year we’ve had and not being able to see people in person for so long, it seemed a good way to let people know we’re thinking of them. Since I don’t have a lot of use for Easter cards, I only have one stamp set and that has been sent to everyone already so I needed some fresh material! Hello Cricut! I found a free SVG file from Craft House, cut out some bunnies and tails and created this card.
Whilst weeding the vinyl and seeing the outline of the bunnies, it occurred to me that I could make a stencil of the bunnies. So, I created multiple bunnies in Design Space, arranged and sized them for my card and cut out two stencils from acetate – one for the bunnies and one for the tails!
Using my new blending brushes, I added pastel colours to the bunnies through the stencil.
Once the bunnies were complete, I added the tails using white pigment ink. Unfortunately, this didn’t show up as much as I thought it would so I went over the tails again and added white embossing powder which, when heat set, showed up much better. Embossing paste would probably work well too.
One of my cards was an ombre and on the other, I tried to colour each bunny separately. Some of the ink did get onto the adjacent bunnies but they still look OK.
Inspired by the bunny stencil, I then made another stencil, this time of Easter eggs and blended the same colours into the gaps.

This stencil had a nice gap in which to stamp the greeting.
I’m so happy with how these cards turned out and I love the blended pastel colours too!


Comments
Post a Comment