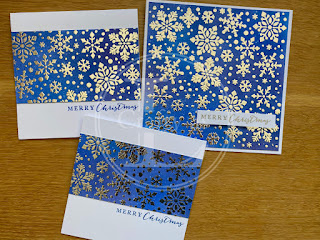
Fabulous Foiling
Recently, my Mum has been diagnosed with Alzheimer’s. The doctor said that learning new things could be good for her so I invited her and my sister round to make some Christmas cards. My mojo is still not in full flow so I wanted to something relatively easy so decided to try out a new product I’d bought to make some foiled cards.
We started by blending a variety of Distress Oxides to make the background for our snowflakes. After blending, the card was spritzed with some water to create the distressed look.
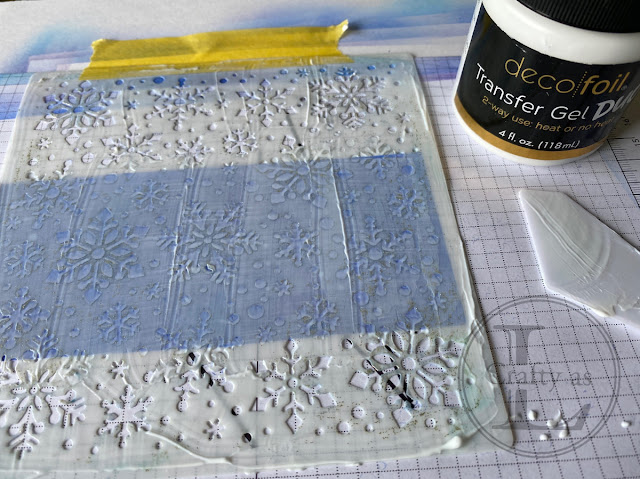
Next, the Newton’s Nook Snowfall stencil was taped in place before applying a thin layer of Deco Foil Transfer Gel Duo. The stencil was removed and the gel left to dry, when it will be clear but it is still sticky.
The duo part of this gel means that it can be used to foil either the usual way with heat in a laminator or by pressure using a die cutting machine. For the snowflakes, I used the pressure method. The foil was placed on top of the card and then run through my Big Shot. I was very excited when I first peeled off the foil to reveal uber-shiny silver snowflakes on the background! So pretty!
I wanted the snowflake panels to be the focus of the cards so simply added a sentiment.
For the snowflakes, I used Cricut foil so I wanted to try out some proper Deco Foil to see if that was any different. I tried this out with the Newton’s Nook Holiday Foliage stencil and Deco Foil in a gold and green mix. To asses the different finish between using pressure or heat, I did one of each with these panels.
 |
| The one on the left is the heated foil, the pressure foil on the right. The heated one has a smoother finish |
Again, I left these panels as the focal images on the card and just added a small sentiment.
I really love the shine on these cards and enjoyed showing my Mum and sister how to make them - and they had fun too!


Comments
Post a Comment