Electronics!
My card this week took me back to my school physics lessons – that’s a long time ago! It seems that I do have a need to know about series and parallel circuits after all 😊. I did have to get some assistance from Mr L until I got my eye in. If you do not have your own Mr L, there are some great YouTube tutorials to assist you.
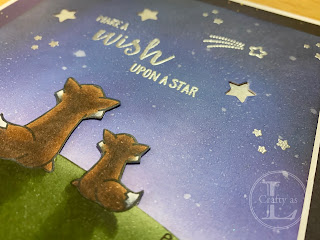
To begin with, I made a scene to light up using critters from Lawn Fawn Upon A Star and ink-blended a night sky using Distress Oxides.
The lit element was to be 3 stars so I die-cut the shapes and then traced the holes onto another piece of card the same size as my topper. I applied self-adhesive copper tape to form the circuit and made a push switch using a piece of card wrapped around the battery. The LEDs are self-adhesive from Chibitronics and just need to be firmly stuck onto the copper tape.
 |
| Top tip from Mr L: If you’re using more than one LED, the circuit needs to be a parallel one, otherwise the battery won’t provide enough voltage. |
For the stars, I took a piece of vellum and marked where the holes were. I scribbled where the holes were with my Wink Of Stella pen for a little sparkle then turned it over and stuck into place on the back of the front panel.
Lastly, I added lots of foam tape behind the panel and mounted it onto the circuit. The foam tape needs to be thicker than the battery height so that the battery ‘switch’ has to be pressed to complete the circuit. I identified the place to be pressed and wrote “press here” in the spot to activate the switch.
The whole lot was matted and layered onto a 7” card base. Here’s the card in action.
Buoyed be the success of this card, I had a go at making one with a sliding switch as this would not be activated accidentally if it was sent in the post. The basic circuit is pretty much the same but has a sliding mechanism that completes the circuit and activates the LEDs.
For this card, I used MFT Make A Wish dies to cut out the flames and added gold vellum behind the panels and red vellum hearts on top.
Here’s this card in action.
This was a great project, if a little infuriating at times!!


Comments
Post a Comment