Glorious Gardens
Today
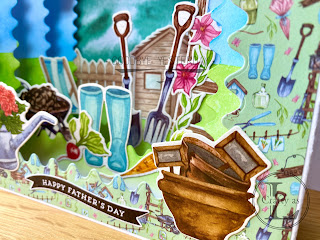
is Father’s Day in the UK so I’m sharing the cards I made for my Dad and Father-in-Law. I was inspired by a floating die-cut card made
by Jessica Rouke in Papercraft Essentials #225 and used the Potting Shed Luxury
Paper Pad Kit to create gardening themed cards.
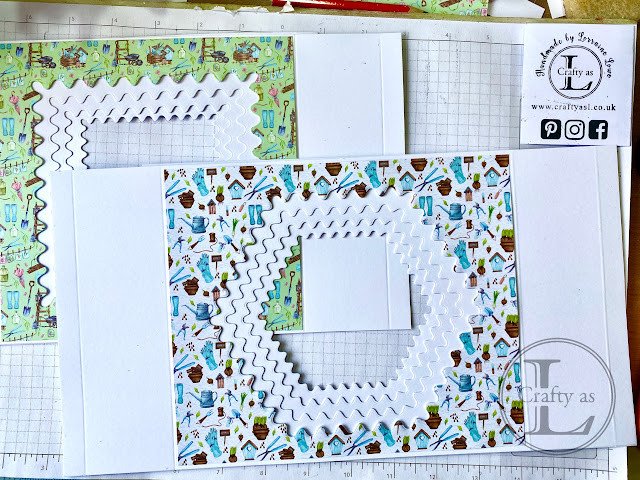
To begin, I cut all my pieces for the cards and die-cut the inner pieces using Creative Crafts Products Rick-Rack Nesting Dies Hexagon & Squares. You can make this card any size to suit the dies in your stash, just add 5” onto the width of whatever size card front you want and score at ½” and 2½” from each side. Cut the inner layers a smidge under 1” wider than the card front size and score at ½” from each edge. Cut another piece of card the size of the card front for the back piece.
For the card fronts, I attached patterned paper using small dots of temporary adhesive and cut the aperture. For all the following layers, I used the layer above to help line-up the die on the layer beneath, taping the die in place using low tack tape.
The patterned paper was adhered to the card front and I ink blended Mowed Lawn and Tumbled Glass ink onto the inner layers around the aperture.
Next came the assembly. Glue the panel with the smallest aperture in first, lining up the edge with the ½” score line of the front piece. I then folded that panel over and glued the next panel in place. This process was repeated for the third piece.
To attached the layers to the other side, I folded all the panels face-down and folded the tabs back. Glue was added to the tabs and then the other side piece was folded over and held in place until the glue dried. If you’ve cut the panels accurately, they should be nicely stacked ½” apart. I’d cut mine a bit too big (I forgot to take off the smidge!) so my layers were a bit wavy. To complete the box, I adhered the back panel to the remaining tabs after decorating the inside with patterned paper.
The final (and fun!) part was the decorating. I glued the toppers in place on the various layers and finished with one of the wooden ‘seed’ markers.
The sentiment is from the Avery Elle 'The Man' stamp set.
My last card is a quick one for Mr. L from our cats. I used the small stamps from Avery Elle 'Furry Friends' to create the letters and the cat. The rest of the sentiment is from 'The Man' set. I love doing the different cats’ signatures!


Comments
Post a Comment