A Trio Of Pumpkins
Hello
and welcome to my DT make for the Visible Image blog. From the latest new release, I’m using my
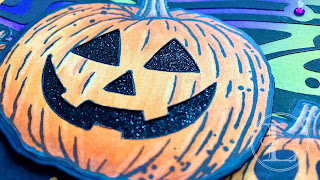
absolute favourites, the Halloween Pumpkins and coordinating dies. There are two pumpkins (and the big one is
huge!), some inky splatters and two sentiments in a great font. It was the size of the large pumpkin that gave
me the idea for this interactive slider card. There's a quick YouTube video showing how I made this card here.
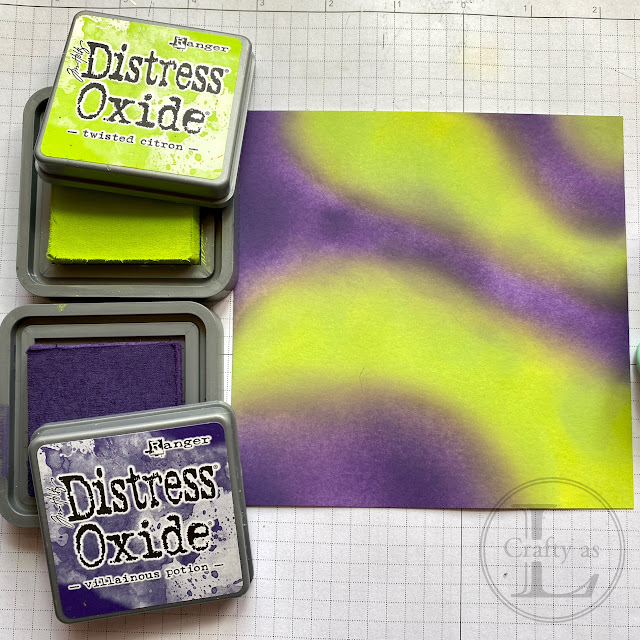
The background was the ideal place to start as it would need to dry. I began by blending Distress Oxides in Villainous Potion and Twisted Citron onto a 15cm square of white card.
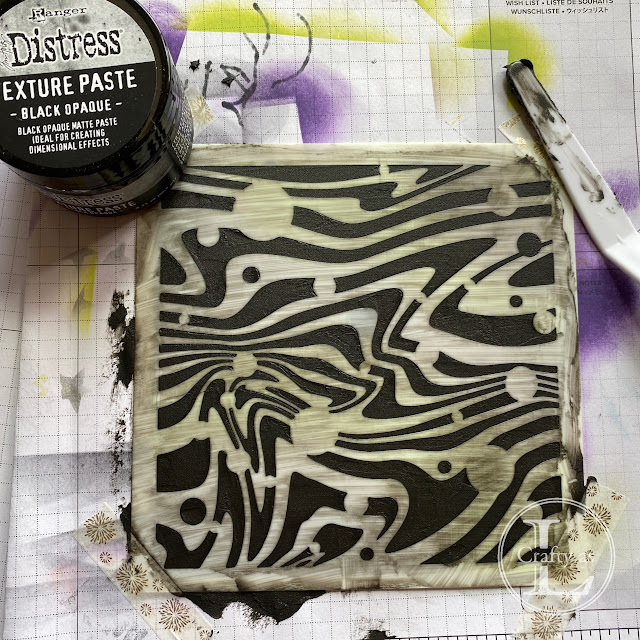
Using the brand new Multiverse stencil and Ranger Distress Black Opaque Texture Paste, I used a palette knife and applied paste through the stencil. I carefully peeled the stencil off the panel and washed it immediately in warm soapy water. The panel was set aside for several hours to dry fully.
Using Memento Black Tuxedo ink, I stamped the pumpkins and then coloured them with Copic markers. I also coloured black around the edge of each as I didn’t want a white border when I’d die-cut them.
I die-cut the pumpkins and used a craft knife to cut out the eyes, nose and mouth of the large pumpkin then went around the cut edges with a black marker. Using black glitter card, I die-cut another large pumpkin and adhered it behind the large coloured pumpkin.
Next was to make the slider mechanism. I cut a piece of card 7cm x 5cm and, with the card in landscape orientation, trimmed it into a ‘fat H’ by cutting the centre 6cm x 0.5cm from the top and bottom. The critical part of this is the plastic that wraps around this H piece and I’ve found that thin carrier bags (the cheap 10p bags, not the bags for life!) work really well. I trimmed a strip of plastic bag slightly narrower than the recess, wrapped it around snugly, but not too tightly in, and adhered to itself using strong adhesive tape. I placed this behind my large pumpkin and trimmed off any corners of the mechanism that were protruding.
For the tabs, I cut 2 pieces of black card 6cm wide, one 6cm long and the other 5cm long. Using the smaller piece for the top pull tab, I stamped and green heat embossed 'Happy Halloween' at the top of the tab. For the bottom pull tab, I wrote 'PULL' at the bottom and heat embossed the 'Trick or Treat' sentiment just above this. I rounded the corners on each tab.
To attach the tabs to the slider mechanism, I added a strip of adhesive tape to the bottom of the back of the slider (bag) and attached the bottom of the Happy Halloween tab – it will be behind the slider mechanism. I added another strip of adhesive to the top of the front of the slider and attached the top of the Trick tab to this – it will sit on top of the slider.
Thin strips of foam tape were adhered to the sides of the slider and the it was attached to the back of the large pumpkin. Every time I added foam tape, I checked that the mechanism still worked.
The background panel was trimmed to size and I adhered the two small pumpkins. I then added foam tape to the sides of the slider panel and pumpkin and attached it onto the background panel.
For a matching mat layer, I cut a square of white card 1cm larger than the background and coloured around the edge with the same orange marker I’d used for the pumpkins. The background was adhered onto the mat and then mounted on a square black card base. Finally, the card was embellished with purple and green gems.


Comments
Post a Comment