Happy Brrr-thday!
Welcome to my Visible Image DT post where I’m stretching my stash and using a Christmas set to make a birthday card. My Mum has Alzheimer’s type dementia and I wanted to make an interactive card for her that would make her smile. The frosty mornings we’ve had recently inspired me to create a chilly-themed card and penguins were the ideal assistants!
To begin, I applied Ranger Transparent Matte Texture Paste through the Frosty stencil onto a 5⅜” square of white card.
Once I had a good, even layer of paste, I scraped off the excess, carefully peeled off the stencil and added Wow! Whirlpool Embossing Glitter and heat set. The panel was set aside to cool and set. The mix of embossing paste and glitter gives the background lots of texture and sparkle.
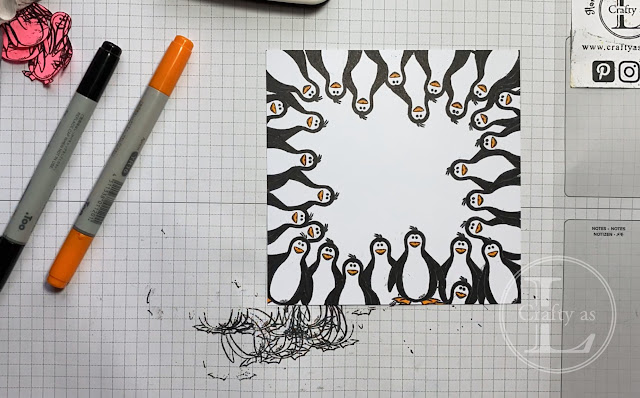
Next, to create my penguin border, I cut a piece of white card 5½” square and stamped the penguin from the Snowman Jack stamp set around the edge of the square. To make masks to enable the gaps to be filled, I stamped 3 penguins on a sticky note and fussy cut. These masks were then placed over the stamped penguins so I could stamp the next penguins behind the front row. This was repeated until the frame was complete.
The penguins were simply coloured black without any shading, adding orange for the bills and feet.
To add a bit more chilliness to the frame, I stamped the snowflakes using Versafine Clair Warm Breeze and added Cosmic Shimmer Brilliant Sparkle Clear Mirage embossing powder and heat set. This gave the snowflakes a glittery shine.
Using small, sharp scissors, I cut the centre from the panel, fussy cutting around the penguins and snowflakes. My top tips for doing this are to turn the panel, not the scissors and to cut from underneath the panel. I also stamped, coloured and fussy cut another single penguin.
To attach the frame to the textured frosty background, I needed a thicker glue than I usually use so I opted for Stix2 Silicone Adhesive. Upon removing the cap, my adhesive had set in the top of the tube so I had to chop off the bottom of the tube and squeeze the glue out of that end. What a mess that was!! Anyway, it did the job.
To give the interactive element to the card, I used a ‘wobbler’ – a plastic spring with adhesive pads on the top and bottom. I attached one pad to the back of the penguin then added some more silicone adhesive to the other pad and glued it in place in the centre of the frame.
Finally, for the sentiment, I wanted to use the ‘Brrr’ stamp for the first part of birthday. I thought that the font style from Blow Out The Candles suited the card so used the ‘Happy Birthday’, masking out the ‘Bir’ with a sticky note when inking up the stamp. I also added the Cosmic Shimmer embossing powder to the sentiment.
I
cut out the sentiment in a rough rectangle and attached to the frame using a
piece of foam tape. To finish, I stamped
and coloured the penguin on the inside of the card and on the envelope.


Comments
Post a Comment