More Than Chips!
Mr L and I have just celebrated our 10th wedding anniversary. I wanted to make him an extra special card for the day so it had to be a fun-fold. A few years ago, I made a twist ‘n’ pop card from Sam Calcott’s YouTube tutorial so I decided another one of those would be perfect. I had lots of requests for a video tutorial for my last card so I finally got around to making one to go with this; you can find it here or watch it at the bottom of this post. This mechanism works for a vertical pop panel in a standard card style or a horizontal pop panel in a tent fold card, like I made here.
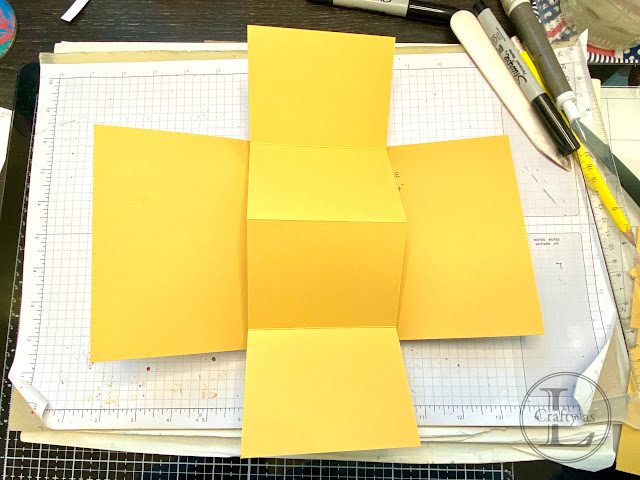
I started by making a proforma that I could keep for a future reminder of the process and I wrote my notes inside too. If making the actual card, decorate the pop panel before assembling as it doesn’t lie flat afterwards. I used a 5¾” square card blank, although a 6” one will also work if that’s what you have. The other two pieces of card required are:
Pop panel: 11” x 3¾”, scored at 2¾”, 5½” and 8¼”
Mechanism: 8” x 3½”, scored at 4” along the long side and 1¾” along the short side. Along both long sides, mark at 2¼” and 5¾” and score diagonally at these marks as shown.
After scoring and folding along the lines in both directions, fold the pop panel into a ‘M’ shape. Push the sides of the mechanism in towards the centre to create a triangle with two legs, a sort-of house shape.
Lay the mechanism on its side and apply strong double sided adhesive tape to the triangular section. Mark 1¼” from the end of the top leg and apply adhesive tape below this line. Turn the mechanism over and repeat on the other side.
Remove the liner tape from one leg (A). Take the folded pop panel, folded sides to the left, lift up the bottom leg (B) and stick the panel onto A along the 1¼” line marked earlier. Try to ensure that the panel is central, with an even overhang top and bottom of the mechanism.
Turn over and repeat the procedure, lifting up leg D and sticking the panel to leg C.
Mark the centre of the card blank along the fold; for my card that was at 2⅞”. Before sticking, ensure the mechanism is the right way up! If you’re making a horizontal pop panel, the part that’s attached to leg B will go to the left. If it’s a vertical pop panel, the part attached to leg B will go downwards. Remove the tape liner, line up the point of the triangle with the mark and press in place, ensuring the bottom edge of the pop panel is parallel with the edge of the card.
Remove the tape liner and fold over the front of the card and press to secure the adhesive. The twist ‘n’ pop card should now be complete!
To finish my actual card, I used Friendly Seagulls that I had got from Stampin’ Up! as part of their recent Sale-a-Bration promo. I decorated the insides by swiping a marker pen back and forth to make the beach and added the shell and dot stamps. The sky was done by ink blending over my homemade cloud stencil. I worked out where ‘chips’ would be on the pop panel and stamped the sentiment in line with that.
My pop panel was decorated with the seagulls and the ‘chips’ sign cut using Tim Holtz/Sizzix Sidekick Letterboard dies and embossing folder. With hindsight, I should have used paper for the red mat layer as the whole card turned out to be rather sturdy with 3 layers of card on the pop panel and card base.
To finish the front, I stamped and coloured all the picture elements from the set randomly across the panel. I wanted the letterboard on the front too to tie-in with the ‘chips’ sign but after die-cutting the letters, I realised that ‘anniversary’ was too long to fit on the front so stamped it instead.
The card in action!


Comments
Post a Comment