Posts

Showing posts from February, 2020

Fun Fold: Double Easel Step Card
Image
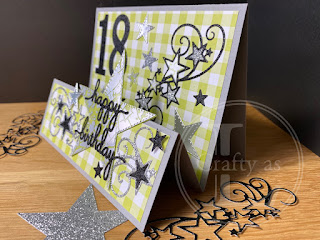
  My card this week is one I made for my God-daughter’s sister, Charlotte, who celebrated her 18 th birthday last week.  I picked these colours as they are similar to those she chose for her bedroom, so I’m guessing she likes them! The card is another ‘fun fold’ called a double easel.  It is built from a standard card base with an extra half sized piece fixed on the front.  First, I glued the extension piece on place and then attached my various decorative paper panels. Next, I die cut a bunch of decorative elements from the Stampin’ Up! Stitched Stars set.  I wasn’t exactly sure what I was going to use but I like to use this process to create.  I also die cut a ‘happy birthday’ sentiment and number 18. I stamped the piece to write on, which was going on the back, and the envelope with one of the star images from the So Many Stars set. Here’s the finished card. The great thing about this style of card is the added dimension given by the front fold....
This Little Piggy

Image
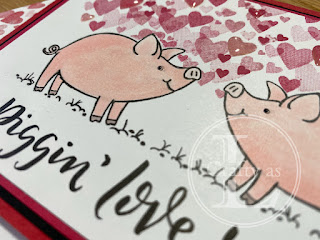
It was Valentine’s Day on Friday and whilst we don’t buy big presents or go out and get fleeced for a distinctly average meal, I do enjoy making a card for Mr L.  He generally gets his crafting on and asks for access to my craft room to make me a card too – which I LOVE! I don’t get many handmade cards.  I’ve just got the This Little Piggy set and thought it would be perfect to use for my card using the mirror stamping technique.  I wrote this  post last March on how to do this technique, if you’d like a refresh. To begin, I mirror stamped my pigs. Next, I coloured them in using some alcohol markers and also drew in some more grass in the gap in the middle to unite the two images. I then stamped the pig on the front and back of a post-it note and cut around them to create two masks. Note: The ink stamped on the adhesive on the back of the note stayed wet for a long time so I repeatedly pressed the adhesive part on scrap paper. Using the bunch of hearts from F...

Very Versailles

Image
The Stampin’ Up! Very Versailles set is a simple, elegant set which can be used to create cards quite quickly.  I think it also lends itself to a vintage look.  To achieve that on my card, I simply used a sponge dauber lightly on the edges to give a slightly distressed finish. First, I stamped the lettering twice in Smoky Slate. Next, using Mint Macaron, I stamped the leaf image twice into the gaps. I often find the sentiments in the sets a bit “full on” as is the case with ‘Always thinking of you’ in this set.  Normally I would do a bit of surgery and cut off the ‘always’ but I was concerned that the long crossbar of the ‘t’ in ‘thinking’ would lose some support and smudge so opted to cover it instead when I inked up the stamp.  Then I removed the cover and stamped my sentiment. The last job was to build my card by mounting the front onto a Mint Macaron mat and then onto a thick Whisper White card base and adding some self-adhesive sequins.  

Thoughtful Blooms

Image
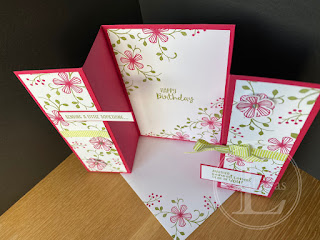
The weather here in the south of the UK has been particularly dismal for the past few weeks.  The eternally grey and rainy skies have really been getting me down so to cheer myself up, I thought I’d make a bright, happy, flowery card.  My stamp set of choice was the freebie from Sale-A-Bration called Thoughtful Blooms and the matching punch. I decided to do a gate-fold design so cut my card base from Lovely Lipstick and some Whisper White panels to decorate the front sections and inside.  The flowers and foliage were stamped using Lovely Lipstick and Old Olive inks. These panels were stuck onto the card base after attaching a strip of ribbon for some added texture and interest. The single flowers were cut out with the punch.  To give them extra dimension, I used my ball tool and the foam mat from my Stamparatus to curve the flowers. I added a medium sized rhinestone in the centre of the flowers and glued them on top of some of the flowers on the front of the ...