Posts

Showing posts from March, 2024

Easter Bunnies

Image
  Happy Easter!   I hope the Easter Bunny has been and delivered you lots of goodies.   My Easter cards this week were my take on the ‘inkbox’ technique, by Sarah Anderson, that I saw in the Lavinia For You Facebook group.   This involves using the lids of Distress ink pads as the starter frame for the stamping. For Easter colours, I chose to use Distress Oxides in Mustard Seed and Twisted Citron.   After dabbing the edges of the inkpad lid onto the inkpad, I stamped it onto watercolour paper.   Whilst the ink was still wet, I went around the inside of the square with a paintbrush and clean water, just catching the line to allow the ink to flow into the water. Next, using the Lavinia Featherleaf stencil and the same ink, I lightly applied ink through the stencil with a small brush, leaving the centre light. The next step was to stamp some small areas of text in the background before stamping the images.   For some stamps, I masked the bottom or s...

Nutty Squirrel

Image
Welcome to my DT post and this week, I’ve been busy making an interactive card featuring the Nuts About Squirrels stamps and dies .   I do love an interactive card, particularly one that doesn’t require any specialist dies, which allows you to make it any size you like.   This one was for my husband for our wedding anniversary. To begin, I made a panel to chop up for the background.   I applied Deco Transfer Gel Duo through the  Leafy stencil and left it to dry before placing a Deco Foil green and gold foil sheet over and running it through my Big Shot.   The ‘Duo’ part of the gel is that either pressure or heat can be used to fix the foil so you can use a die-cutting machine or laminator to complete the process. Next, I stamped the squirrel, leaves and acorns and coloured them using a variety of alcohol markers.   After die-cutting them, I added some clear Nuvo Drops to the squirrel’s eye, nose and to the acorns for some extra shine. Now for the ca...

Spring Flowers

Image
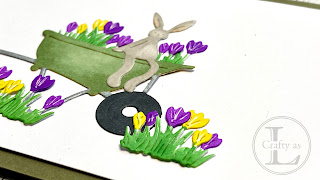
Floral cards seem to be my thing at the moment.   I guess it’s the garden starting to come to life again and flowers peeking their way through the gloom that are providing the inspiration.   Since moving back into my craft room, I’ve found things that I forgotten I bought so when I rediscovered these dies, I decided to have a play. The rabbits and wheelbarrow are from Charlie & Paulchen, a German company, and the tiny flowers are from Gummiapan in Sweden. When I’m making cards like this, I like to get all the die-cutting done at the start so I just cut out loads of the flowers and then coloured them with my markers.   I opted to just use the crocuses and snowdrops and omitted the dandelion, as I was thinking of these becoming Easter cards. Then it was just a case of layering everything up.   I chopped some of the flowers apart so I could rearrange them so they didn’t look quite so uniform.   I also positioned the main focal image at each end so that th...

Sending Sunshine

Image
Wasn’t it glorious to see some sunshine last weekend?   It gives me so much more energy and impetus to go and do something when it’s bright outside.   My card this week, together with the ATC I made for the Visible Image ATC swap for March, was inspired by the bright sunshine lighting up the daffs in the garden.   The theme for the swap was “Flora & Fauna” so the Golden Daffodils stamp fit the bill perfectly. I wanted to try out my recent purchase of some Tim Holtz Distress Stain sprays.   They have been around for years but I’ve only just gotten around to purchasing some.   To begin, I stamped and heat embossed the daffs on my card and ATC and then applied masking fluid onto the flowers and stems. After leaving them to dry naturally, I sprayed with Mustard Seed, Broken China and Cracked Pistachio stains and set them aside to dry. To help remove the masking fluid, I used a glue eraser, which I think is the same stuff that plimsoll soles were made fr...

Rainbow Cupcakes

Image
Welcome to my latest DT post.   I was delighted when Visible Image gave us coordinating dies for Blow Out The Candles in their latest release.   This set was already quite versatile but with these dies, it’s now an essential craft supply.   I didn’t mind fussy cutting the cakes but the candles…not so much. To celebrate this fabulous time saver, I made a card with LOTS of die-cutting! To begin, I stamped and clear heat embossed the cupcake and candles 7 times and coloured with alcohol markers.   I like to add clear heat embossing when I’m using alcohol markers as I don’t have to worry about using alcohol-friendly ink to stamp the images. Next, I die-cut the lot of them.   It took about 2 minutes – woohoo! I have a magnetic platform in my Big Shot but I still like to use a little tape to hold the dies in place. For the background, I used more goodies from the new release.   The lovely, large sentiment is from Best Birthday Ever , which I stamped and...

Kiss From A Rose

Image
My cards this week started by the need to make an anniversary card for my parents.   They’ve been married for 55 years and although sadly, dementia has robbed my Mum of this knowledge, it’s still nice for Dad to get a card and some choccies.   I’d made these sheets of card as part of a 100-day Instagram challenge and the first week’s prompt was to use sprays.   I realised that I didn’t have many, just some Nuvo shimmer sprays so I sprayed a couple of sheets of white card with those.  I die-cut a heart from my yellow and gold creation and dry embossed it with Altenew Garden Roase 3D embossing folder.   I then used a piece of sponge and dragged gold ink over the high spots to add a little highlight.   Using a larger sized heart die, I cut two to make the card base and gold-heat embossed the sentiment.   I love the finish of this – it reminds me of meringue on top of a Baked Alaska! Next, I cut a bunch of white and black panels and embossed all of the...