Posts

One For The Books

Image
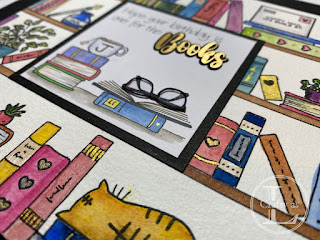
This card was a commission from a friend for a card for his wife.  The brief was “she likes books”.  I don’t have any stamp sets or dies featuring books and, whilst there are some available, the cost was rather high just to make one card.  My drawing skills are minimal but I figured I could draw a few books since they’re basically just rectangles so I set about sketching a doodle-style bookcase, adding a few stamps that were the appropriate size. After this sketch was approved by my friend, I started on the proper version.  I wanted to watercolour the images so drew out the shelves on watercolour paper and stamped the various images in place using Versafine Clair ink, which is waterproof. Using a waterproof fineliner, I then drew in the books. Once the drawing was complete, I pulled out my paints and spent a pleasant half hour adding some colour to the images. For the central focal panel, I had planned to use the Cricut to cut out so...

Easter Bunnies

Image
  For my Easter cards this year, I used the Anita Jeram Happy Easter stamp set, by Colorado Craft Company and Bunny Friends by Penny Black.  Those bunnies are so cute! First, after stamping with waterproof ink, I completed the pictures with some watercolour painting. The card bases are from a pad of pre-scored patterned card.  The polka dots make a fun background for the images. The watercolour finish was quite muted and I wanted to see how differently they’d look coloured with more intense colours.  I stamped with MFT hybrid ink and also stamped the same image onto some masking paper.  After applying the masking paper, I blended some green ink onto the ground area and used a cloud stencil and blue ink for the sky.  I then removed the masking paper and coloured with my Copic markers. To extend the scene, I sketched in some silver birch trees on the sides.  You can see the difference in the intensity of colours between the water...

Metallic Accents

Image
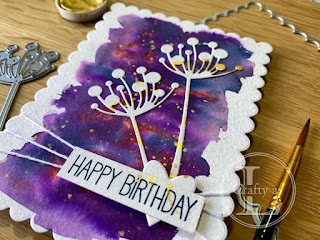
This week’s post features an outing for a rarely used die that I bought when I first started card making many years ago.  It’s a silhouette flower/foliage that I really like the shape of but have never really used very much. As I was planning on white silhouette images, I needed a vibrant background so I dug out my Brushos.  I mixed up some Prussian Blue and Purple and, after putting on some clean water onto my watercolour paper, dropped in the colours and let them mingle and do their thing.  To add some sparkle to the background, I spattered on some gold Finetec paint.  On another piece of watercolour paper, I swirled some of the gold paint to use for the die cuts. Once the paint was dry, I die cut the panel with a scalloped frame and cut out the flower heads. The flowers were glued onto the background and a little white twine was wrapped around the panel.  From the leftover gold-spattered card, I die cut a small heart to cover the base of ...

Moonlit Anniversary

Image
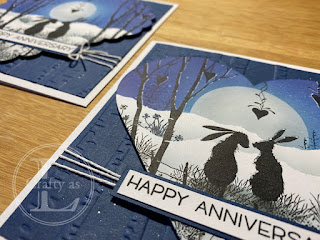
I have quite a few anniversary cards to make during the first 3 months of the year.  These 2 were made for my parents and some close friends – neither of which know each other so it didn’t matter that they were similar.  I used a variety of stamps by Lavinia Stamps and Inkylicious. To start, I die cut 2 hearts, one scalloped and one plain edged, and some masks from sticky notes.  I added a moon mask and then blended some Distress Oxide inks to the sky, then removed the moon mask and added some grey to the moon. After stamping some distant trees, I moved the masks down and blended a little ink to create the landscape and added some more stamping.  The bunnies were added and then the scene built up around them using various trees, shrubs and a fence. For the background, I used the Stampin’ Up! Woodland embossing folder and a square of navy card and a few Posca splats. The sentiment was stamped and mounted onto a navy rectangle. To assemble the card, I added some fun f...

Mother's Day Moggies

Image
Happy Mother’s Day!  My cards this week are the ones I made for my Mum and Mum-in-law using the Colorado Craft Company For Mom stamp set, another one by Anita Jeram. Firstly, I stamped the main image and coloured it with my Faber Castell Polychromos pencils.  I tried to add some variety of shade but didn’t bother to blend the colours. My plan was to blend the pencil colour using Zest-it Pencil Blend and some paper stumps.  It’s my first time using this and it worked well.  It’s an oily texture and I poured some onto a sponge I’d put in a small jar so I could dab the stumps onto the sponge.  This was a tip I got from a Sandy Allnock video.  For the background, I repeat stamped one of the smaller stamps from the set with Versamark and heat set with clear embossing powder.  I also added this stamp to the envelope and liner of the card. To finish the card, the panel and sentiment were mounted on a stitched panel before being adhered to the background and ...

Sending Love

Image
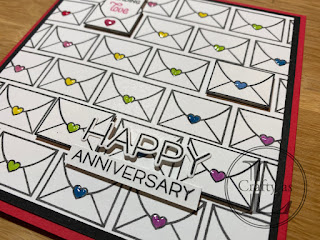
  Following a tidy up of my craft room, I realised that I have so many stamp sets and dies that I bought ages ago that have been either rarely, or never, used so I’m making an effort to give them some love.  This week’s post features a first outing for the Lawn Fawn Love Letters stamp set. To create a background of envelopes, I had in mind that I’d do it with my stamp positioner.  However, on starting using that, it was clear that it was going to be a complete faff so I just stamped them free hand instead.  I used MFT Hybrid ink as it’s Copic-friendly. I coloured the hearts in a rainbow pattern with my Copic markers.  For some accent pieces, I stamped and fussy cut some envelopes and a sentiment from Lawn Fawn Happy Happy Happy. The sentiment was mounted onto two of the envelopes and popped up on foam tape. To finish, the other two accent envelopes were adhered using foam squares and an enamel heart embellishment added to the open env...

Cardstock Strips

Image
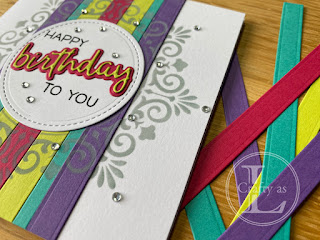
  This week’s card is one I made after watching the fabulous Jennifer McGuire on YouTube.  Her card looked so elegant so I wanted to have a go.  On reflection, I think I could have done with a larger stencil that covered more of the card. To begin, I cut a bunch of strips of various widths from 4 colours of card.  This is a great way to use up some of those off-cuts! Next, I glued the strips onto some scrap paper and trimmed the panel to the height of the card blank.  With Distress Oxide Weathered Wood, I used a blending brush to stencil the Frame pattern (Sweet Poppy Stencils) centrally onto the panel and card blank. The birthday and shadow dies are by Honey Bee Stamps and were cut from the same-coloured card as the strips and mounted onto a stitched circle die cut. I finished the sentiment panel with some stamping. Due to the stencil not being quite big enough, I thought the card needed a bit more interest so added rhinesto...